Tag Archives: chocolate

Sawing Logs

21 Apr

Oh, Wilton Bear Pan, how many ways to use you! There’s bears, lions, and uh…and uh…I know there’s a ton more. Beaver! That’s it! Beaver.

Ever notice how there’s not much beaver stuff around? Ever see a stuffed beaver in the toy aisle? A beaver chocolate mold? A beaver anything? The naughty girl industry has taken over the beaver and I say we take it back! Back, I tell you! No more shall we ashamed of the word in public! No more shall we hide our liking for such an industrious beast! Chant with me: Beaver! Beaver! BEAVER!

 Uh hum. Pardon me. Must have missed a dose of meds somewhere. Today’s post is about a furry mammal that builds dams, is the original “Baby Got Back” in the tail department, and has teeth the Osmonds envy. The Castor Canadensis also happens to be the mascot of a certain fraternity (you know who you are, I need not name names).

This beaver starts with the aforementioned Wilton Bear pan. I do not promise to show you miracles for arms, as I still do not possess such enlightening. However, I can show you some stellar tail.

The pan comes with instructions. Follow them. Mostly. Lose your instructions? Here ya go:

Click to access 2105-603Stand-UpCuddlyBear.pdf

While we’re clicking away, here’s a link that shows you some of the many uses for the bear that never poops in the woods:

http://www.wilton.com/shapedpan/Stand-Up-Cuddly-Bear-Pan

 Lose your clips? Wilton occasionally sells replacement here:

http://www.wilton.com/store/site/product.cfm?id=3E3107DF-475A-BAC0-517051D099ACA8A8&killnav=1

I read on the internet, back when it was the Internet, that you can use binder clips, too. Cause you know everything on the www is the gospel truth. The hubster and I conversed about such an option. After he informed me that there may be leftover oil on them from production and considering the possibilities of heating paint in the same small enclosed space as food, I decided against such folly.  So buy them when you see them.

Back to cake. The instructions will confuse, befuddle, and thrill you. Tis true, you bake him on his head. 

Tis also true you best set him on an old cookie sheet lest you like cleaning your oven.

Look, Ma! Beaver poop!

Ooooh, I don’t think he feels so good. Must have been on his head too long.

All better now? No kissing boo boos until you cool off!

Okay, enough goofiness. Someone remind me to take those meds tomorrow, k?

Take out the core, but don’t clean it just yet.

(I’ve never had one, but this is how I picture the aftermath of a colonoscopy.)

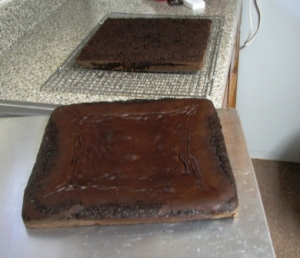
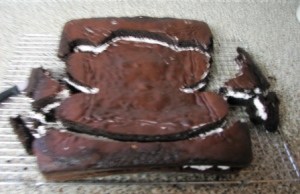
Here is the portion of the evening where I veer from the Wilton pros. I put the core back in and leave it there while it cools. Your choice, your comfort level. Other than that, follow the cooling instructions. First one side…

…then the other.


Now, let’s decorate! You will need brown/chocolate buttercream and some yellow and white (a small amounts). If you’re going to decorate the board, you’ll also need green. For the fondant, I used tiny amounts of black and white.

Crumbcoat your beast.

Doesn’t help with the defecation image, huh?

Using the grass tip (#233, found here: http://www.wilton.com/store/site/product.cfm?sku=402-233), convince the chicklet to pipe the bear. After all, you’ve got a tail to form. Remind her that his tummy and inner ears shall be yellow, or white, before you rush out of throwing range.

While she’s planning her reveng, get out the following schtuff:

Chocolate for melting

Wilton garland marker (http://www.wilton.com/store/site/product.cfm?id=3E30D6CC-475A-BAC0-58FEDC73887B09DD&killnav=1)

Tape

Wide straws

Wax paper

Table knife

Sharp knife

Ruler

This is the part where we really improvise. Put a piece of wax paper on your work surface. Assemble your garland marker to a size called, “looks right.” (Poinky part facing up) Put one straw on each end of the bendy part of the garland marker. Move the other end of the straws until they are touching or almost touching and tape them to the wax paper so they don’t move. Take another straw (or trim one of the other ones before taping. That’s what my cheap tail did.) and clip off a piece to the length of “that’ll work.” Place the short straw in between the other two. Confused yet? No worries, I took a picture. It should look like this:

Look like tail you’d chase yet?

Before you melt the chocolate, read how to make the tail so you can move as quickly as you need to before the chocolate sets up. Even though my sentence will say, “Melt the chocolate,” don’t do it yet; don’t believe me, I lie.

Melt the chocolate. Pour the chocolate into the mold to a depth you are comfortable with. Too thin and it may break. Too thick and you’ll be on a sugar high until your trainer uses lunges to cleanse it out of you.

Let the chocolate cool a bit, but NOT completely. Once it  firms up a bit (but not completely hard), use the ruler and the table knife to score it into a diamond/criss cross pattern. Do NOT cut all the way through or you’ll have to start over. I am not responsible for do-overs. Now, let the chocolate harden completely and remove the mold from around the tail. Use a sharp knife to carefully remove stray bits of chocolate.

Thank the chicklet for her services, promise her you’ll pay for her carpal tunnel surgery later in life, and carefully place the beaver on the board. Use a round tip and pipe the eyes. Using the black fondant, cut small circles and place them in the appropriate pupil place, AKA “about there.” Cut a small triangle and place it in the proboscis area. Cut two small rectangles of white fondant and put them in the chopper area.

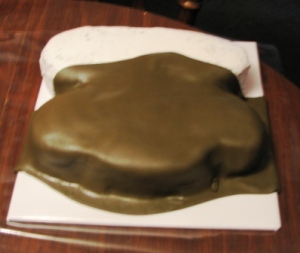
Realize that you have 5 minutes before the beaver leaves to build a dam, smear green buttercream on the board and pipe extraordinarily long grass. Consider it the beaver stocking up on vegetation for the winter. Place tail on the board in the buttage area, wave bye-bye to it, and wish it luck on its two hour car trip. Don’t tell it a horde of college kids who are always hungry and love free food almost more than checks from parents await it, should it survive the trip under the watchful eye of Mattimeo, the chinchilla.


Good thing I didn’t name him.

Buh Bye, Beaver Boy!

Eat Your Heart Out

16 Jan

Whew! Everyone make it into 2011 okay? We didn’t leave anyone behind, did we? Woo-eee, what a ride! Have you been wondering where I am, if I’m okay, if I gave it all up to become Diddy’s personal assistant? Naw. I’ve been around. I’ve been hanging. With my peeps. Little peeps, big peeps, annoying peeps, and Little Bo Peeps. Or doing endless college assignments, picking up after those-who-are-old-enough-to-clean-up-after-themselves-dangit! and baking, baking, baking! Whatev.
I feel like I should have written posts for a year before publishing the first one. The thing is, you get them hot off the presses and right outta my kitchen. That makes it kinda tough to make a post about a holiday cake when the holiday has just passed. After all, I make my stuff as close to the day as possible. Which means, by the time the kiddos head back to the Ivy League, the holiday is but a distant memory except for the mess they left behind. Luckily for me, I have an ace up my sleeve. Okay, a heart, but still- I’m ready ahead of time for the next holiday.

This time, let’s do something for the less experienced among us. That right, rank amateurs, step on up! If your idea of making a birthday cake involves sticking candles in a cake covered with canned frosting and still in the pan you baked it in, holla! This one’s for you!

Swanky Heart Cake

I actually wrote this a few years back for a friend. I was just beginning my cake journey. Everybody say, “Awww!”

Okay, let’s get to it.

 Bake one 8 inch round cake AND one 8 inch square cake. Let cool for a bit and then remove from pans.

(Chocolate or Cherry Chip would go well.)

Make 2 batches buttercream pure white icing. Set aside approximately 1 ½ c. and tint it pink. The pink should be the consistency for piping. (This assumes your recipe takes 1 lb. of powdered sugar.)

Leave the remaining buttercream white at a consistency for frosting the cake with the exception of approximately 1 ½ c. for piping (make the 1 ½ c. the consistency for piping).

 Place the square cake on cake board, making sure one corner of the cake points to the bottom middle of the cake board and attaching with a dab of icing underneath to keep it in place.

Cut  the round cake exactly in half. 

Frost the cut edges of the round cake and 2 adjoining sides of the square cake. Place one cut side of round cake to one frosted edge of the square cake. Press together until it holds. Repeat with other half of round cake and other side of square cake.

So I’m not that great at fussing with shapes using a computer. *shrug* Close enough.

Using a heart shaped cardboard template covered in plastic wrap, place it in the center of the cake, making sure the point of the template matches the point of the heart cake. Go ahead and mark this space by white creating shells around it or just leave it in place to remind you not to frost there.

Crumb coat the rest of the cake white, let the icing crust and then smooth with your preferred method. If the round and square cake do not match exactly in size, fill it out with extra frosting to make it even and look almost seamless. The finish coat will finish the job of hiding the seams.

Finishing icing the cake with white, let crust, and smooth with your preferred method. You can use an icing comb on the sides of the cake at this time if you like. However, remember you must have a thick coat of icing to use the comb.

Thin a little of the pink frosting to spreading consistency and spread it in the middle-following the heart template. Smooth the pink as best you can. You do the pink last because it’s a little tough to cover pink with white, but not white with pink. Keep checking that it is lining up with the point and curves of the top edge of the cake- you don’t want an off-center heart in the middle.

Using a star tip (a bigger one works fine for the borders but use a little smaller one for the heart center) and white frosting, pipe shells to outline the top of the cake and the middle heart shape.

Again using a star tip, pipe the bottom border with shells and pink frosting.

Cut one Hershey bar into smallish chunks and place around bottom border and on top of center heart shape.

Fill in between the top white shell border and the inner shells outlining the center heart with cherry pie filling. Use a large eating spoon (AKA soup spoon) and be gentle so you don’t glop it where you don’t want it.

Melt another Hershey bar and put it in a squeeze bottle or disposable piping bag. Drizzle melted chocolate on the board in whatever way you like. Alternatively, you can do this with a spoon but your drizzles won’t be as small or as exact as you would like.

Finis! Cut, Enjoy, and Give away the leftovers!

This Just In

2 Aug

This week is gonna be bussssyyy. Groceries, periodontist, the Chicklet’s birthday, last week of class, and possibly Primitive Boy moving out of the manse. Y’all are lucky I’m here at all. LOL I’d like to find the highly degreed person who decides students should have one less day to complete the work plus an extra assignment that includes a long paper for the last week of class and have a “chat” with that person. Do they really think we worked on that paper all quarter as suggested? Yeah, right. Also, I would like that person to know that some of us notice things like the abstract is due before the final paper and the link you gave the students that explains an abstract says clearly that the abstract is written last. Cart before the horse or forcing students to turn in work before it’s officially due so the professor can knock off work a couple of days early? You decide. I’ll keep my opinion to myself until they slap that degree in my hand while I’m shaking hands with someone Important that I’ve never met while trying to smile and face a photographer who apparently is getting a shot up my gown from the looks of his position below. But I digress. Once again. I’m good at that, at least.

I blew off some things I didn’t want to do anyway and updated our PowerPoint portfolio. (Yes, it really is spelled that way.) We would LOVE it if you’d look at it and leave comments with your opinions. How is the layout? Colors? Organization? The fonts? (I kept them all in the Lucida family because Primitive Boy’s explanation about fonts and foots and all that stuff made my eyes cross. Never ask the opinion of someone who wears a t-shirt that says, “All I care about is ink, fonts, and crap like that.” Just shut up and kern for me, k?) I took out the character cakes and such even though they were all made as gifts. No sense in angering the mouse, eh? I think we’re far enough along in this adventure and therefore have enough cakes in the portfolio without them, anyway. We want to know it all- the good, the bad, the ugly, the few, the proud, the chosen…oops! Wrong blog for that.

Let us know what you think while I’m off pretending to be a grown up. Or working on my tan at the beach. Whichever.

 2Chicks Cake PowerPoint

Truffle Addition

10 Jul

Ack! I can’t believe it’s been nearly a month since we’ve posted! The Summer sun calls and I’m taking yet another class that takes waayyyy too much time. I promise we’ll get our stuff together soon and post a full post. In the meantime, I thought you might be interested in something KHalstead posted here: http://cakecentral.com/modules.php?name=Forums&file=viewtopic&t=660467&postdays=0&postorder=asc&&start=15

Instead of using cooling racks for the truffles, she uses styrofoam. I tried it tonight and it works WONDERFULLY! Cover your styro with wax paper, shove the toothpicks through the wax paper and styrofoam and let it drip away. It’s easy to peel the drips off the wax paper and the only trimming I had to do was a tiny bit underneath the truffle. Now I don’t have to hold my breath while I pull the truffle filled wax paper off the cooling sheet and onto a cookie sheet. Woo hooooooooooooooooo!!!!!!!!!!!!

Thanks, KHalstead!

Truffle Board

14 Jun

Whew! Modem problems, graduations, final exams, and cakes have kept me away far too long! Fear not. I have not forgotten nor forsaken you, my lovely cake friends. I have files upon files filled with scrumptious cake happenings to show you, starting with this:

For the two people who haven’t heard, one of the latest crazes in cakes is cake truffles. Please, call them truffles. They are time consuming to make and if we keep calling them cake balls no one is going to want to pay what they’re worth. Think marketing, k? Besides, some people are immature and snicker when you say, “balls.” 

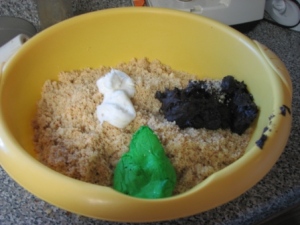
Cake truffles are a great way to use leftover cake, but they can also be made with an entire cake. You will, however, have to invest mondo amounts of time to do an entire cake. Just sayin’. Plan accordingly. Basically, you smoosh the cake into crumbs, add icing, roll into ball shapes, and dip the truffles in chocolate. You can use any combination of flavors that strikes your fancy. You can add flavored oils to them if you like. You can use up leftover frosting. You can magically use vanilla cake and turn it into chocolate cake just by using chocolate frosting. They can be frozen. Watch out for bloom, though. If they bloom, thaw them until they are dry and sift either confectioner’s sugar for white chocolate or cocoa for regular chocolate over them to cover up the white spots. The spots aren’t harmful, just fugly.  I actually prefer them frozen. I should warn you: they are addictive. These are not “I need to fit into a smaller size” treats.

I’ve figured out all sorts of things along the way, but there was one issue left and I think I may have solved it. How does one set them down after dipping? I’m jumping ahead, though. Let’s start at the beginning.

The cake needs to be broken up into small pieces. It should be bigger than grains of sand, but smaller than chunks. Chunks will make it difficult to roll a smooth truffle. The easiest way I’ve found to do this is in my food processor.

Now add the buttercream. Some people use canned frosting, but the best flavor is with homemade, in my opinion. Here, I’m using bits of leftover frosting from other projects.

See the dark chocolate frosting? That’s what is going to turn this vanilla into chocolate.

The amount of frosting to use varies from cake to cake. Start small and add more as needed. Don’t go by the amount shown above as the bowl is potato salad for a family reunion huge. Start with one of the dollops shown and go from there. Test it by rolling it into a ball shape. You want it to firmly hold together without cracking.

(I added cocoa to this batch to make it more chocolately and to correct adding too much frosting.)

It will probably stick to your hands a bit once you’ve rolled 3 or 4 of them.

(Shoes are for sissies or paid orders, LOL)

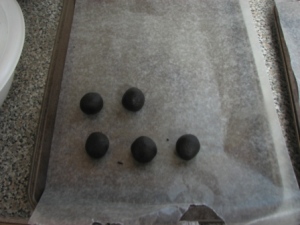
Once you’ve reached the correct consistency, roll all of the truffles and as you roll them place them on a waxed paper lined cookie sheet.

When the sheet is full (or you run out of mix, whatever happens first), put them in the freezer. At this point you can freeze them until they are solid, toss them in a Ziploc type bag, put the bag in the freezer, and stop here until you are ready to dip them. This is handy if you don’t want to risk chocolate bloom but don’t have time to do it all right now.

Once you’re ready to dip, have the paper lined cookie sheets handy. I like to start with an empty one so I’m not maneuvering around the undipped ones. However, with my latest method, this isn’t a problem.

The type of chocolate you choose is personal preference. You can use chocolate chips, candy melts, leftover Easter bunnies, or go high class and use couverture (that’s so fancy I don’t know how to spell it). Let your budget and personal preference guide the way. The important thing here is that the chocolate must be tempered. It what you use isn’t already tempered, you’ll have to learn how to do that first. A topic for another day and for someone much more experienced than me.

Note: Chocolate and moisture do not mix. It will make the chocolate seize. You will know it has seized because it won’t be all melty and smooth anymore. You can try to rescue seized chocolate by stirring in shortening a teaspoon or so at a time until it returns to the correct consistency.

Now that you know that, chop the chocolate.

Hang in there, we’re almost done. It’s time to melt the chocolate. There are three methods to accomplish this:

Double boiler (see above pic)

Microwave (which is difficult for me to achieve the perfect temp: melted but not burned)

Crock pot type melting device (see below pic)

(The pictures I’m using are a combination of batches. The ones shown above are coconut flavored cake truffles.)

Get the truffles from the freezer while you are melting the chocolate. If you dip them when they are too cold, the chocolate will crack so you want them solid enough to hold together while dipping, but not too solid or you’ll have to dip twice to cover cracks. Dip to your heart’s content, let the chocolate set up, and they’re finished.

This brings me to my dipping experiment. As I said, I don’t have a lot of luck moving the truffle from the chocolate dipping area to the cookie sheet. I have tried all sorts of devices: toothpick, fork, spoon, and several special instruments made for chocolate dipping. None of them work to my satisfaction.  Tapping the instrument against the side of the pan helps the excess drip off but you can’t do that with a toothpick. If you don’t use a toothpick, you have to cover them completely with chocolate, which means there’s no uncovered “blow hole” to prevent blow outs. It’s a dilemma.

Instead of using cookie sheets to place them on to harden, get out your cooling racks and cover them with waxed paper. This method uses more toothpicks, but sometimes sacrifices must be made. Using one of the toothpicks, poke holes into the waxed paper.

Hopefully you can see the spaced holes in the picture. Dip the truffle into the chocolate, covering almost completely. Remember: you want a small spot left uncovered. The sensible place for this is near the toothpick which you stick into the middle of the bottom of the truffle so it won’t be seen unless someone has an uncontrollable urge to look at truffle butts or something.

(The uncovered area should be a lot smaller than shown above. This picture also shows the difficulty in dipping when the chocolate level gets low.)

Now that the truffle is dipped, you are going to put the toothpick (still stuck in the truffle) into one of the holes in the waxed paper. It’s easier to start in the center of the rack and work your way outwards.  One hand holds the toothpick from above while the other waits underneath the rack to receive the toothpick. Move slower than you think so it’s doesn’t drop from one hand to the other.


Place the toothpick into the hole, pause, put your other hand underneath and grasp the part of the toothpick sticking through the hole. Remove the hand that’s above the rack, and with the hand that’s grasping the toothpick below the rack, lower the truffle until it is sitting on the waxed paper. Let go of the toothpick and slowly remove your hand from beneath the rack.

Ta da!

Your truffle is now sitting on the rack and it hasn’t rolled anywhere, you didn’t scrape off chocolate getting it from the toothpick to the rack, and your fingers aren’t chocolate covered in the process.

You can dip about 6 truffles and then the chocolate is set enough on the finished truffles to enable easy removal of the toothpicks so you can reuse them for the rest of the truffle dipping.

Other than using more toothpicks, the only problem I have with this method is removing the chocolate that pools at the bottom of the truffle. When using the cookie sheet method, you can score around the bottom of the truffle before the chocolate is completely set. You can’t do that with this method. However, I always had to fine tune them with the other method, so it’s no biggie for me.

Once the chocolate is completely set and all the toothpicks are removed (you can place the racks in the fridge or freezer to hurry this process), use a cookie sheet (rimless is best) and slowly pull the waxed paper off the rack onto the cookie sheet. Most of your truffles should stay stuck to the waxed paper. If not, as long as the chocolate is firmly set, it’s not a problem. Now that they are on a solid surface, you can trim the pooled chocolate with the knife of your choice.

Eat. Enjoy. Place in mini cupcake wrappers and impress your friends with their elegance.

Just don’t try this unless it’s Halloween because people freak out far too easy and won’t eat them.


Practice Makes Perfect or Perfect Practice Makes Perfect?

6 Apr

Spring has sprung (at least on some days). Feets and arms and knees and such are about to come out of hibernation.  Combined with changing fashions, I have to face the truth: pleated shirts cannot carry my stomach through another warm season. Getting my capris and shorts out of storage didn’t help, either. Dang it!

Something Must Be Done. Drastic Measures Must Be Taken.

But what?

I have to stop making so much cake and buttercream “just for practice.” Still, I do need the practice. My piping skills have gone from so-so, just need to perfect the rose and writing, to “are you sure you’ve done this before?”  I, my friends, have over-fondanted. I like fondant. It’s fun, it’s crisp, it doesn’t involve quite the amount of small motor skills as piping. Plus, I don’t eat much fondant as I practice. I wish I could say the same for buttercream. Fat and sugar, sugar and fat. Yum! I started playing with buttercream again to sharpen my skills. After all, some day fondant will be passé and clients will go searching for the caker who cakes “the old-fashioned way.” I must be prepared, right?

With my sugar addiction in full swing once more, and my summer clothes laughing when I tried to squeeze them beyond my Shar Pei thighs, I’m gradually changing things up in the kitchen. Mr. Handy is cool with salad for dinner once a week (after many eons of trying to slip it in) and leftovers are still breeding like rabbits since the kiddos decided to engage in some strange ritual called “college and job” so it’s easier for me to take those leftovers and make a meal for one that’s not packed full of the carb fest of rice and noodles that my Sugar Daddy, ooops! husband, adores. I’m drinking more (the non-alcoholic, non-calorie version of that word. No need to replace one addiction with another, I suppose). Still, that leaves the cake/buttercream issue. How can I practice without sugar laden goodies?  Everyone I know says they want free cakes, but no one is willing to come pick them up. That leaves a lot of cake in my kitchen.

I never wanted to do this. It seems like such a waste. Waste is bad. Save the earth, save the chocolate, save the buttercream! Alas, the return of my mother’s stomach in the mirror leaves me no choice. I must practice, gulp!, without cake. But, wait! you say; because you are smart like that. What about the buttercream? Does this mean that now I get to eat buttercream by the mixing spoonful since I cut out the cake calories? Alas, no, it does not. With the exception of the occasional, “what the crap is going on with the frosting? cake, my crumb and final coat are not a problem. I can smooth out nearly every crater you throw at me. Piping practice is what I need and that, my dear friends in cake, does not take much buttercream at all. In comparison, anyway. A quart sized baggie instead of the mondo gallon sized ones. Add in that you stick a tip in a bag, and not much buttercream flies anywhere anymore, much less near the pie hole. *Sigh* I’m in mourning. Is that natural? Don’t answer that. I don’t really want to know right now. Maybe later.

Lest you think this blog has become a confessional of purging caking demons, I do have a tutorial in mind. Waaaaiiit for it.

A couple of weeks ago, I was out of buttercream. My recipe takes 4 lbs. of powdered sugar so just imagine for a moment how much buttercream that makes. A Lot. A lot of buttercream, a lot of calories, a lot of inches on the waist. We all know that no matter what we say to ourselves before it happens, there will be buttercream calories on the scale the next day. I like to think it’s magic. Too bad that magic doesn’t transfer to my once cute as heck shorts, huh?

I was firm with myself for once and made an alternate choice.

No, not that kind.

 I’ve heard you can do this with toothpaste, but toothpaste is a lot more expensive than buttercream. I think. I haven’t actually run the numbers, but it seems to my sugar addicted mind that it is. So, no buttercream and no toothpaste. What’s left?

Chocolate

Stay with me here. I haven’t gone off the deep end yet. Probably not, anyway.

Yes, chocolate is still a lot of sugar. No denying my way around that. I also love the taste of chocolate. So much that I will eat sugar-free chocolate despite a case of the toots the rest of the day.  I had been piddling around with the idea of trying chocolate transfers again. You see, I fail at buttercream transfers. I’m missing the gene for it or something. But chocolate, maybe chocolate is the answer. Plus, the chocolate discs can be used in small amounts and are fast to melt and be ready for use when I have an hour to spare to play around. The other handy property of chocolate is: it’s hard to eat much when it’s flowing like Wllly Wonka’s river through the piping bag. You’re too busy trying to keep it corralled to eat much of it. It’s also messy as heck so you spend a fair amount of time with a washcloth in one hand and a piping bag in the other.

So, chocolate it is. Now, I’m not saying I’m a whizz here. No chocolate transfer miracles occurred. These things take time and practice. But one day, maybe; one day I might practice enough and the seas will part and the chocolate will stay put and not lump and I will create awesomeness. Just maybe not today.

It helped that I just read the Whimsical Bakehouse book.

Full of chocolate plaque visions, I tried a beaver first.

Heh. He’s a bit rabid, doncha think?

It’s tough to keep the chocolate at the right temperature: melted enough to flow smoothly but not so thin that it’s running like it’s had too much fiber, if you know what I mean (These kinds of thoughts keep me from considering consuming it in vast amounts while I’m practicing). I did a little better when I free handed a cloud looking object.

Okay, maybe I need more practice. Still, it looks better than my last wrestling match with buttercream transfer, so there’s hope in there somewhere.

What I really liked was writing with it. No messing about with the elusive perfect consistency ‘cause chocolate is what it is. I got brave enough at the end to even try a little freehand action.

Yup. Still can’t freehand. However, notice that there are no breaks in the chocolate. It’s actually even fairly straight. The bottom is even, but the top needs work. Also, spacing is still a problem. I think I need to figure out how to either get a template on the cake and pipe over it or figure out how to remove the chocolate from the wax paper without breaking it so I can place the words on the cake.

Yes, I know about using piping gel and rubbing it onto the cake, but these ol’ eyes aren’t getting any sharper so I have my doubts it would be obvious enough to be useful for me. Plus, I’m pretty good at smearing things when I shouldn’t.

There’s info everywhere about how to do this, so I’ll make this short. You need:

Waxed paper

Image/template

Chocolate discs

Disposable piping bag

Microwave

Tape

You can get the template by printing the picture of your choice from your computer. I suggest one without a lot of details to start. Also, look out for impossibly teeny spaces you won’t be able to get chocolate into.  Like girl child beaver wrists.

For the writing, I used Word and typed with different fonts, and then printed it.

Place your template on your workspace and tape it down to keep it from moving. Place the waxed paper over the template, and tape that down, too. Don’t use tons of tape or you won’t be able to remove the waxed paper easily.

Place a dozen or so chocolate discs in the piping bag and microwave the bag in 20 to 30 second increments. Take it out, smoosh it around to mix, repeat as needed. Stop nuking it when it’s almost completely melted. The remaining heat and smooshing will finish the job without burning the chocolate.

Snip a tiny hole in the end of the bag. You’ll have to experiment a little to figure out the right size. If that’s too frustrating, grab another disposable bag and rig it up with a coupler and a small round tip. Not to state the obvious, but don’t put your couplers or tips in the microwave. It will be pretty, but no good shall come of it. Once you have the second bag ready, snip off the end of the first bag (the one without the coupler and tip) and insert it inside the first bag.

Now, you’re ready to practice. If you messed around with royal icing and cookies, you know what to do. If not, here’s how:

For images: outline the image, including any parts you want separated from the rest like the arms. You are building the image from the front to the back. This means you create the facial features, let the chocolate set, and then fill in the other parts like the belly and feet. If you want toe/finger nails, pipe those and let it set before you make the actual foot/hand. I hope that makes sense. Look at your image for a couple of minutes and think about how you need to build it. You may even want to write it down for reference and to make sure you’re not overlooking something.

The important things to remember are:

Let each layer harden before adding the next

Chocolate spreads

For writing: just have at it. Remember to move your arm rather than your hand and to let the line fall into place rather than trying to etch it onto the surface like you do with a pencil.

What I don’t know yet: how to make the chocolate smooth.

I know I have to keep it melted, but the stuff is hardening in the bag and I’m trying to hurry before I run out of time and it’s a rock again so I just hope it all levels out.

It doesn’t.

It seems to me that it also needs to be cool enough that it doesn’t melt the features I’ve already added (like eyes) and it also can’t push down on those features to make them spread and thus make the image look messy/creepy. Eh, it’s a work in progress.

Leftovers: like dinner, I always have leftover chocolate and I believe, with all my heart, that every time you throw chocolate in the trash, a butterfly loses a wing (just kidding, kids. Calm down). Therefore, I put the leftover chocolate into a mold and, after it sets, bag it for use another day.

Now, put down that frosting and give me 2 miles on the treadmill! The dreaded bathing suit is just around the corner!

Aaaaaaahhhhhhhhhh!!!!!


Oh, Fudge!

20 Dec

The kitchen is clean so of course we must mess it up again right away. Why wait for the kids when you can do something yourself, right?

This recipe is from a book I stole from my mother when I left the nest. I could soft coat that, but it’s Christmas and Santa knows all anyway. It’s from an old HER Realty cookbook. It requires no candy thermometer, no marshmallow cream, and no fancy ingredients. It doesn’t even require a stove. This recipe was created using the new fangled machine of the time: the microwave. Man, I used to sit in front of ours convinced the radiation would kill me like Spock in that one movie. Ah, those were the days!

The ingredients are simple:

Peanut Butter Fudge

1 lb. Confectioner’s sugar (have extra on hand)

2/3 c. Chunky peanut butter

½ c. Unsalted butter or margarine

¼ c. Milk

 1 ½ t. Vanilla


Chocolate Fudge

1 lb. Confectioner’s sugar (have extra on hand)

½ c. Butter or margarine

1/2 c. Cocoa powder

¼ c. Milk

 1 t. Vanilla

¼ c. Nuts, broken (optional)

That’s it. For both fudges. Nothing fancy, nothing that takes hours, but something that will win over the boss and get your Christmas bonus after all. Hey, we can dream of more than just sugarplums, right?

First up: Peanut Butter Fudge

Soften a stick of butter and sift the confectioner’s sugar. Even if you think it doesn’t need it, sift it. You don’t want lumps or you’ll be in the kitchen all night and Santa won’t come ‘cause a creature is stirring. And stirring, and stirring.

Except for the vanilla, put all the ingredients in a microwave safe bowl. I use a casserole dish with its handy dandy lid for the task.


Nuke it for 2 minutes.

While it’s radiating itself, prepare your pan. Spray the pan or a piece of foil with nonstick spray. For the first time ever, I used wax paper. Don’t do that. It will be nearly impossible to get the fudge out of the pan. Always livin’ and learnin’ over here.

When the ding dongs it will look something like this:

Stir it for a bit so it looks something like this:

and then nuke for another 2 minutes. Stir again until it looks like this:

It will be hot, so don’t burn yourself like I usually do. Take it out and stir it until it’s smooth. Add the vanilla, and stir again.

It should look like this:

It will be thickish, but how do you know it’s thick enough? Experience. Don’t have any? I’ll lend you mine. Rarely is 1 lb. of confectioner’s sugar enough. Sure, you could give it a whirl. If it doesn’t set up, use it as a topping for ice cream or something.

If it’s not sheeting, it’s not thick enough. Add more sugar and stir it in. By not sheeting, I mean it shouldn’t run off the spoon:

Like a certain someone drooling over Clooney, huh?

If yours look like mine, add more sugar and stir it in.

Awesome one handed action shot, huh? I have the greasiest camera in town, hands down. One hand, anyway.

That’s better. It should cling to the spoon- kind of like stiff buttercream.


Plop the goop onto the foil.

(Pretend that’s foil. Sheer foil. My newest invention.  I’ll make scads of moolah, doncha think?)

Pick up all four corners and put the package in the dish.

Spread it around as needed.

Stick in the big cold box for at least 20 minutes. It’s done. You can freeze this, so feel free to make it at the beginning of December and pull it out Christmas Day. Because you have enough to do as the month flies by, that’s why. Do what you can, when you have time to do it.

Onto the fudge version. The process is a little different, so pay attention.

Put the butter into the microwave safe dish, and nuke it until it bubbles- about a minute or so.

Clean up tip: use the same lid you did for the peanut butter fudge. Odds are it’s still clean and it will be one less thing to wash if you use it again. Not stylish, but practical.

Working fast at this point (so the butter stays hot and it doesn’t get too stiff to work with), sift the cocoa powder and confectioner’s sugar into the bowl.

Add the milk.

Now add the vanilla.

Stir it until it’s smooth and perty.

Stir in the nuts, if using.

Add more confectioner’s sugar if it doesn’t look like this:

Like before, scrape it out of the bowl and onto the foil. Pick up the corners, and place the package in the dish.

Spread it around as needed, fridge that puppy until it’s firm. If you want something with more zing!, crush candy canes and press them into the top before it sets. You could also substitute chopped candy canes for the nuts or even sub mint flavoring for the vanilla. I’m more of a purist. I like chocolate and mint, but it’s hard to eat a whole pan of it. A couple of pieces, yes. A whole pan, no. What’s the point of cooking if you don’t want to shovel down the whole batch? That would be, I dunno, normal or something. *Shudder*

Done. One hour, two fudges. No fussing with equipment. Simple. Yummy. Freezable. Why not? Santa eats it whether it takes 2 hours or 2 minutes. It’s sugar. Eat it.

Meet Me Under the Mistletoe

8 Dec

Betcha thought I forgot about ya’, didn’t ya’? Nope. Just “busy, busy, busy” to use those immortal magician’s words. 

For a change, I thought I’d post a holiday themed cake before the holiday. I have a few holiday cake pictures in my collection but since they aren’t created until the week of the holiday, it’s kind of hard to post them after the holiday and not look like I don’t know what the date is. I gotcha this time, though.

Way back when at the Farmers Market, we held a drawing for a free 6 inch cake. The coupon was cashed in recently and the winner wanted a chocolate cake with chocolate mint frosting. The cake was for a church event and she liked the outdoors and Christmas. From there, the rest was up to me. The cake was supposed to be a simple design, per the rules, so I restrained myself and designed a mistletoe cake, thereby giving her both the outdoors and Christmas on one cake. I’m smart like that.

We start with the obvious: a 6 inch cake. This one is actually 2 six inch cakes stacked. That’s what my recipe makes, so why not use all the cake? My freezer is plum full of cake truffles already so I have no need for more extra cake. I have to have room for other holiday goodies in there, doncha know.

Level the cakes (level-ish, according to the pictures)


Fill and stack the cakes:

I put a dowel down the center of my cake because, as you see, it’s a bit tipsy.

Crumb coat (stop me if you’ve heard this before).

Finish coat:

Lacquer coat- wait, that’s cars; this is cake. Get a ruler and draw diamond shapes (ish, again. Dear Santa, for Christmas I would like a diamond impression mat because now even hubster cannot draw it.)

(We should have left it like that, but of course we didn’t.)

Try to figure out the circumference of a 6 inch cake, and then decide to wing it and cut a rectangular strip for the top edge of the cake. Roll it out 4 times until you remember to roll up the strip to move it onto the cake instead of picking it up while it’s flat and screaming in frustration when it rips.

Put the strip in its proper place on the cake.

Use white icing and a round tip to fancy up the intersections of the diamonds. Except you will use the smaller tip even if you think it’s not big enough because, as you see, the bigger tip looks like doody.

Between the mucked up diamond pattern and the gigant-o dots, I hope our winner doesn’t have her glasses on when I deliver this.

Next, cut out more leaves than you will ever use in this lifetime.

I scrounged around in my stuff to find the cutter. You can find it here:

http://www.wilton.com/store/site/product.cfm?id=3E30D6EB-475A-BAC0-5E5EF66C57041711&killnav=1

Dust them with sparkly type stuff.

Make teeny tiny balls of red fondant and dust them with sparkly type stuff, too. Or do what I did- use a pearl maker.

Arrange  leaves around bottom border of cake.

Arrange 3 leaves on top of cake.

Over-leaf the whole thing and remove the excess leaving the top no longer smooth and no longer able to be smoothed. Add red balls for berries on the top of the cake.

In person, it was centered. Seriously. It’s the picture that makes it look “off.” Dunno why. Ask my son, he’s the photographer. I’m sure it’s some really long technical explanation that will make you sorry you asked, but go ahead- ask. I double-dog dare you. My apologies also for the darkness of the shot. Again, ask the kiddo.

Decide the cake is “done enough for  this late at night” and go to bed wondering if you’ll remember to buy a box for it tomorrow so you can deliver it.

Two more weeks of this college class and then I promise to make perfect cakes again. Right after I buy a crap ton of gifts, wrap them, make 2 dozen confections for Christmas, and take a vow of poverty rather than work a 40 hour per week job that isn’t caking.

What do you mean it’s only 2 weeks until Christmas?

Aaaahhhhhhhh! Quick, somebody wrap something! Anything!

Let’s ready to Wrrrestlllle! With cake, of course.

23 Nov

For all of our fans who are into watching grown folks fight like cousins at a family reunion, this cake is for you. With one exception, it’s easy enough to make. Yeah, it’s the exception that’s gonna kill you; but let’s cross that mat when we get to it.

Supplies are simple: square cake, frosting, fondant, chocolate and mold, black straw shaped objects, and fondant (of course).

First, the cake. Square shaped. Anything beyond that is your choice. My line between vanilla and chocolate didn’t come out centered. Note to self: bake 2 separate cakes and join them next time.

Torte, fill with gray colored buttercream, stack, settle, and board the cake.

Crumb and final coat with more gray frosting.

Easy-peasy so far, right? Don’t freak out on me yet. The next stuff is still pretty easy, too.

Using gray fondant, create a rectangle tall enough to cover the height of the cake and long enough to go around the perimeter. Make sure it’s fairly thick to prevent tearing.

Lightly grease on side of the fondant so it doesn’t stick together when you do this:

Rolling it is the easiest way I’ve found so far to move it without stretching beyond all practical use. Roll into a tube, take it to the cake, and unroll it around the cake while adhering it to the side. Once you’re all the way ‘round, trim off the excess and finish adhering it. This is now the back of the cake so plan ahead for this and start unrolling on the ugliest side so you end there, too.

Back before final adjustments:

Front:

Grumble under your breath while you fuss with the height (mandatory).

Still keeping it easy, grab a dowel rod, skewer or other implement and begin dotting the top of the cake to simulate a mat.

The deeper dot in the middle was my starting point. That’s the only thing I measured. There are so many dots on this that unless you veer way off course, it’s not noticeable. Although it looks time consuming, it only takes about 5 minutes to accomplish unless you get obsessive about it. I didn’t. The cake had to be out the door at 7 the next morning and it was already after 9 the night before. Obsessiveness is for those who have loads of time or who don’t have deadlines. In other words, not me.

Logo-ize any way you please.  Remember: you cannot sell an exact copy. Don’t call me when the feds come.

(Loosely inspired by: http://www.wwe.com/)

Let’s see: what supplies are left? Mmm, chocolate. There’s no room on this cake for writing unless you want to detract from the look, so I chose to make a chocolate plaque that can lean against the side. Don’t tell our big boy, but I used part of a mold for a baby carriage to make the plaque. Hey, it’s not my fault I couldn’t find a plain rectangle candy mold. The cake must go on and one has to use what one has, yes? Yes. So, carriage mold it is.

Melt your chocolate, pour it into a clean mold, tap the mold on the counter until the bubbles rise to the top and pop. Refrigerate mold until set, unless you have a lot of time. If you have enough time, just leave it on the counter to harden. Once it’s set, tap it out of the mold and inspect it for obvious flaws. Repeat as necessary.

My handwriting still stinks on cake, despite practice, so I cut out fondant letters. Feel free to pipe letters if you can. I can’t (not yet, but someday!) so I fondanted.

The name has been covered to protect the innocent. Or the presumed innocent. Or the minors among us. Definitely the latter. The cake was for a teen AKA a minor, so I covered it. Pervs and freaks and all that. The age didn’t fit so I left it out. Plan ahead if the age must be on it. Elsewise, you’ll end up here: http://cakewrecks.blogspot.com/ if you try to squeeze it in. As much as I love the place, I’d rather not play a starring role, if ya know what I mean.

What’s left? Thaaat’s right. The hard part. Ugh. Do we have to? Can we just skip to the final picture? Please? Pretty please with whipped cream, cherry, and nuts on top? Dang it.

Okay, the ropes. I recommend you find black licorice strings if you frustrate easily and can get away with it. I couldn’t. A caker’s gotta do what a caker’s gotta do. My supplies included 10 black straws and a box of black coffee stirrers. Stash the coffee stirrers for another project ‘cause they won’t work here, darn the luck. I purchased the straws at the dollar store. They had plastic skeletons on them that slid off the straws and make great toys for someone else’s house. No, I don’t know if your dollar store will have them. I looked everywhere for them and probably the only reason I found these is because it was near Halloween. Best of luck to you in your hunt.

The posts are easy. Stick a straw in the corner, and cut it so it’s about yea high above the cake. Nope, I don’t have a more exact measurement. Night before, remember? Remove the straw and cut 3 more just like it. Save any small pieces. I got 2 corner posts and a scrap from one straw. Stick one straw per corner in the cake.

Think and play with straws for awhile. Wake up the snoring giant on the loveseat and beg for help. Walk away when he starts showing signs of extreme aggravation. Return just in time to help said giant join the last piece.  That’s how it works at my casa. Nearly every cake is a family adventure. Bonding time. Yeah, that’s it.

As near as I can figure, this is how he did it:

Split the uprights- the corner straws. On opposing sides, cut down the length from the top to the point you want your first set of ropes to sit.

Join four full length straws together by gently shoving one inside another. You’re going for a complete square when it’s done. Repeat with 4 more straws.

You’re going to slide your ropes into the corner posts. As each corner is placed, cut a short length of straw to hold it down. Cut the length of the short pieces so they come up to where you want the second set of ropes to start. Do the same with the next set of ropes, but higher up (obviously) and cap the whole thing with another short piece of straw.  I know- this description isn’t clear enough. Hang on; I’ll take some pics that will hopefully explain it better.

Create ropes:

Slit corner posts:

Slide the ropes into the corner posts:

Cut a short length of straw:

Cap the first set of ropes:

Repeat for the remaining 3 corners.

Start from the beginning for the second set of ropes until you finally-

Cap the second set of ropes:

Expect to growl at the last cap. It won’t be happy, but it will eventually do what you need. You may need a second set of hands, though.

I know, I know. It’s not edible and it’s on a cake and I have a “thing” about that. I considered all the options- make fondant ropes and let dry, coat spaghetti in chocolate, use pretzel rods for posts, etc… etc…etc…. Nothing would work as well as this would. I needed a certain look and I needed the cake to travel 45 minutes to delivery and then another 15 minutes to its final resting place. My fondant ropes would probably show chatter from my tool and fondant never dries completely when you really need it to. If perchance it did dry, it was sure to break in transit. I’m leery of using spaghetti in general because I’m afraid it will soften, despite many people who use it successfully. I’m just not that lucky in life.  Besides, what are the odds I can coat the spaghetti to make it that thick and that the chocolate would coat evenly? Slim to none, in my inexperience. I looked for a candy mold to use, but there were none to be found. 

All that to say: give it up.

Buy black straws.

I think it’s worth it. Judge for yourself:

Monkeying Around

15 Nov

Dedicated to all those with a monkey on their back, tattooed or otherwise.

Sometimes, life stinks. There’s no getting around it. Nothin’ you can do about it but make some cake and have a party, right? Let’s get baking. Spatulas up, everyone!

Bake a square cake. Shush. Put aside those corner phobias and just relax and bake the cake.

choc cake in pan compressed

Looks a bit crispy around the edges, but who isn’t a little fried these days?

Cool the cake per usual.

choc cake cooling compressed

Yep, definitely crispy. Eh, more cake scraps for me.

Print your picture and outline it on the back (see the sax cake for more details).

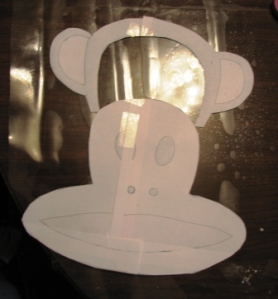
monkey template compressed

(My apologies for the glare. I ironed wax paper onto it to make it food safe.)

Cut out your pic and lay it on the cake to check for size. Very important step, don’t skip it and don’t go forward until you do it. Fo’ reals. Avert disaster, test it out.

fitting monkey template compressed

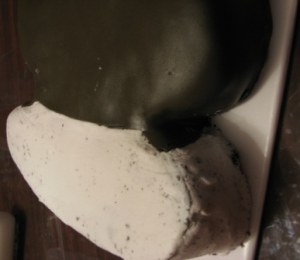
Whew! It fits. Not only that, the crispy edges will go bye-bye, too. What is it about chocolate that does that? By the time the center is done, the edges are hard enough to throw at hubby in a fight. Sorry, didn’t mean to give you ideas. 😉

This is the point I choose to torte and fill the cake. If you like, you can do it after you’ve cut the shape, but I feel more secure if I do it now. One of my many cake security blankets, if you will.

torted choc cake compressed

You like my awesome big cake transfer tortey thingys? Me, too. Both Wilton, thank you very much (http://www.wilton.com).

Get your cake filled and get back here. We’re gonna get out the shiv and do some real damage.

Lay your template back on the cake and begin carving. (Again, see the sax tute for in depth instructions. It’s Friday, long week.)

Partially carve:

first carve monkey cake compressed

Aaannnd fully carve:

final cut monkey cake compressed

Now you can see my real reason for torting and filling first- cake samiches all around, folks! Guess what’s for dinner?

In between bites, crumb coat.

crumb coat monkey cake compressed

Ooh, he’s a bit fugly now. Let’s move on and final coat before I panic.

final coat monkey cake compressed

Okay. Now he’s a bit funky looking. Hmm, I hope this works.

Clean up the frosting stuff, and take a few licks for me. That buttercream is good stuff, ain’t it? Nummers.

Once all the evidence, I mean mess, is cleaned up, get ready to fondant. The colors I used were lots o’ brown and flesh, with a decent amount of red. I think it’s time for a Timely Tip from Timer. Remember him? Hankerin’ for a hunk of cheese? No? Here ya go:

http://www.youtube.com/watch?v=U3jgo5ea_zc

Yes, I’m old. Shut up.

Annnyway, a timely tip. I used Hershey’s dark brown cocoa to get the right brown without emptying the entire bottle of gel color into it.

(http://www.hersheys.com/products/details/specialdark/index.asp?name=Cocoa)

 It’s delicious. I need to diet now, but it’s still delicious.

Now that your fondant is ready, let’s get rolling.

Brace yourself against the counter, Effie; we’re going to go fast for a bit. The pictures should be enough description. 

laying brown fondant monkey cake compressed

first brown fondant trimming monkey cake compressed

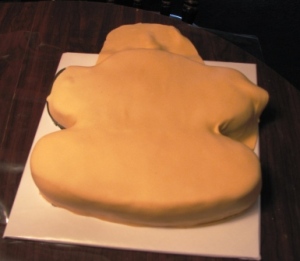
final brown fondant trimming monkey cake compressed

Monkey cam shot:

monkey cam shot compressed

Get it? Got it? Don’t forget it.

Yeah, I’m old. And tired. Don’t forget tired.

Now, we’re going to dissect. The good kind of dissect. Not the kind where you pretended to be sick in 7th grade so you didn’t have to go to school and tear apart that poor dead frog. Paper dissecting only here, if you please. Forget if you please, I please. Blech.

Trim away the top of the head and the ears from the template, like this:

removing top of head stencil monkey cake compressed

We’re not going to do what you think we are. Nope, we’re not. My way is easier. Yes, it is. Stop arguing. Whose blog is it, anyway? That’s right. Mine. Look, if it’s not easier for you, you can always stop and do it your way, k?

Set aside the big piece with the face on it. Think it out for a minute. The entire bottom half is going to covered with flesh fondant. It’s the top half that is bi-tonal. I said tonal, not polar. Leave your coworker out of this. More cake for us.

Roll out your flesh fondant and gently lay it on the cake. Do not adhere it anywhere but the bottom half. All you need to do for the top is make sure it’s not going to tear. You’ll peel away a lot of the top and it will be much easier to do if it’s not adhered.

laying flesh fondant monkey cake compressed

That wrinkle on the right looks like the back of my knees. Don’t tell anyone.

Place the top part of the template on the top part of the cake, like so:

placing top of head stencil monkey cake compressed

He, he. There’s a funky hair-do idea, huh? He’s got kind of a bee-hive thing happening up there.

Pick up your shiv and carefully outline the inner arch. Carefully. Remember, there’s another layer of fondant under there that you don’t want to muck up. I’m too tired to start over tonight so if you mess it up, yer on yer own.

Remove the template and check out your work.

cutting flesh fondant monkey face compressed

Make a second, deeper cut that goes all the way through just the top layer of fondant. Once that’s done, make a cut from the each side of the bottom of the arc you just cut, across the face and down each side. Refer to the next picture before you do this, because I’m not sure I described that correctly.

Once your cuts are made, peel away the excess fondant and adhere the fondant to the cake.

fondant base complete monkey cake compressed

Hmm, he looks more Princess Leia than monkey now. Maybe if she and Chewbacca had a baby? I think I may have slipped over the tired hill and fallen into delirium now. Maybe if I keep typing, no one will notice.

Dipping further into the dissection arena, cut out the facial features. Better stick to template unless you’re really good at eyeballing. I’m not, therefore I cut.

monkey facial features template cut compressed

Hang in there, we’re almost done and then we can all get some beauty sleep. According to what I saw in the mirror this morning, I can use all I can get right now. Oil of Old Lady just isn’t cutting it lately. I blame the kids.

Using the pieces you just cut, roll out fondant and cut the following:

Flesh for the inner ears

Brown for the eyes and nostrils

Red for the mouth

(I know, it seems obvious. One never knows who’s reading one’s blog, though, does one?)

Adhere the features, and declare it, “all done!” in your best speaking-to-a-toddler-high-pitched-voice.

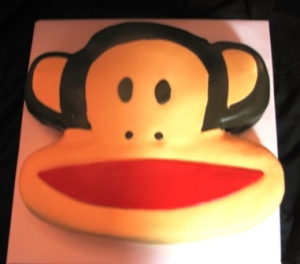
One last picture, then let’s all hit the hay. In our own haystacks, of course. Don’t be gross. I’s tired and not even in college, k?

completed monkey cake compressed

(T- hug those lil monkeys for me tonight.)