Tag Archives: cakes

God Bless America and Give Me Some Cake

1 Jul

I’m alive! I’m alive! It’s a miracle! Err, okay, not a miracle. A miracle would be if something missed me by an eighth of an inch and I lived to tell about it. Or if people saw vining stuff growing up a telephone pole and didn’t think it was a sign from God. Anyhoo, nothing miraculous around here other than my bills are paid. Why I haven’t blogged in awhile is too boring a tale to tell and all that matters is that I’m here now, right?

Aww, don’t be mean. I mean well, I promise. I have good intentions. Almost always.

I have no segue so I’ll just start.

The good ol’ US of A is about to celebrate its independence from some nearsighted king the other way across the pond. I know this because I grocery shopped with the entire population of us’ns today. When do y’all go to work?

If you recall, a few years back, we did this crazy thing called Farmer’s Market. It was a lot of work and we lost a lot of money. During our insane period, I made two cakes that fit the bill for the 4th: a star cake and a flag cake. They’re fairly simple to do and they both could easily be translated into all buttercream if you like. I think someone needs to blog about buttercream cakes. Don’t you? I know I want to advance my skills and would love ideas that don’t involve fountains, stairs, or a star tip. I am going off topic, of course, but still….

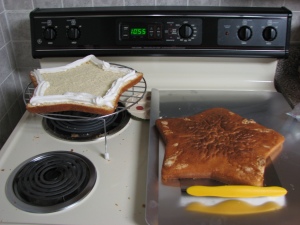
Ok, the star cake. Step one: bake a star shaped cake. Wilton has a pan for this. I think. I’ve got one. I don’t know if they still sell it or not. If they don’t, bake a square cake and cut triangles out of it to make it star shaped.

Torte and fill the cake.

Ice the cake.

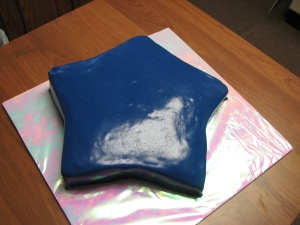
Smooth the icing and cover it in blue fondant.

Roll a rope of red fondant and place it around the bottom edge of the cake for a border.

Cut out a bunch of white fondant stars using a cookie, fondant, or electronic cutter.

Place stars randomly on cake.

Roll out two strips of white and one strip of red fondant. Roll this out on the thin side. Now place the red strip in between the white strips and roll over them to stick them to each other.

Alternatively, roll out one wide rectangle of white and one strip of red that is 1/3rd the width of the white. Very lightly moisten the back of the red strip and place it on the middle of the white strip. Look for moisture seeping out and dab it away as necessary. Roll over the whole shebang to adhere it.

The alternate way is easier, I suspect. I don’t know for sure because I did it the first way and it was not easy to get those strips to stay together. I think they were only children and therefore did not have experience being herded as a group.

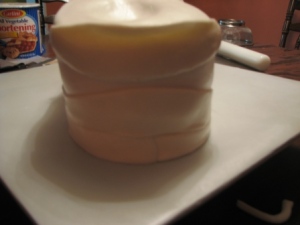
Lay the strip decoratively across the cake and pinch it together in the two or three places you think would look best. Pinch the ends of the strip, too. Yes, that’s an awful description. I don’t know how to describe it any better than that. I do, however, have a final picture of it so you can see what I mean. A picture is worth a thousand words and all that.

Ta da! If I were to do this cake again, I would definitely roll the strips thinner and I would make the pinched parts look better. At the time, it was the best I could do. Now that I know better, I do better- thanks to Maya Angelou.

Oh, that other cake? Eh, next year. Maybe. Right now, I gotta go try to blow off my foot with a sparkler.

Happy Independence/Three Day Weekend America!

Sawing Logs

21 Apr

Oh, Wilton Bear Pan, how many ways to use you! There’s bears, lions, and uh…and uh…I know there’s a ton more. Beaver! That’s it! Beaver.

Ever notice how there’s not much beaver stuff around? Ever see a stuffed beaver in the toy aisle? A beaver chocolate mold? A beaver anything? The naughty girl industry has taken over the beaver and I say we take it back! Back, I tell you! No more shall we ashamed of the word in public! No more shall we hide our liking for such an industrious beast! Chant with me: Beaver! Beaver! BEAVER!

 Uh hum. Pardon me. Must have missed a dose of meds somewhere. Today’s post is about a furry mammal that builds dams, is the original “Baby Got Back” in the tail department, and has teeth the Osmonds envy. The Castor Canadensis also happens to be the mascot of a certain fraternity (you know who you are, I need not name names).

This beaver starts with the aforementioned Wilton Bear pan. I do not promise to show you miracles for arms, as I still do not possess such enlightening. However, I can show you some stellar tail.

The pan comes with instructions. Follow them. Mostly. Lose your instructions? Here ya go:

Click to access 2105-603Stand-UpCuddlyBear.pdf

While we’re clicking away, here’s a link that shows you some of the many uses for the bear that never poops in the woods:

http://www.wilton.com/shapedpan/Stand-Up-Cuddly-Bear-Pan

 Lose your clips? Wilton occasionally sells replacement here:

http://www.wilton.com/store/site/product.cfm?id=3E3107DF-475A-BAC0-517051D099ACA8A8&killnav=1

I read on the internet, back when it was the Internet, that you can use binder clips, too. Cause you know everything on the www is the gospel truth. The hubster and I conversed about such an option. After he informed me that there may be leftover oil on them from production and considering the possibilities of heating paint in the same small enclosed space as food, I decided against such folly.  So buy them when you see them.

Back to cake. The instructions will confuse, befuddle, and thrill you. Tis true, you bake him on his head. 

Tis also true you best set him on an old cookie sheet lest you like cleaning your oven.

Look, Ma! Beaver poop!

Ooooh, I don’t think he feels so good. Must have been on his head too long.

All better now? No kissing boo boos until you cool off!

Okay, enough goofiness. Someone remind me to take those meds tomorrow, k?

Take out the core, but don’t clean it just yet.

(I’ve never had one, but this is how I picture the aftermath of a colonoscopy.)

Here is the portion of the evening where I veer from the Wilton pros. I put the core back in and leave it there while it cools. Your choice, your comfort level. Other than that, follow the cooling instructions. First one side…

…then the other.


Now, let’s decorate! You will need brown/chocolate buttercream and some yellow and white (a small amounts). If you’re going to decorate the board, you’ll also need green. For the fondant, I used tiny amounts of black and white.

Crumbcoat your beast.

Doesn’t help with the defecation image, huh?

Using the grass tip (#233, found here: http://www.wilton.com/store/site/product.cfm?sku=402-233), convince the chicklet to pipe the bear. After all, you’ve got a tail to form. Remind her that his tummy and inner ears shall be yellow, or white, before you rush out of throwing range.

While she’s planning her reveng, get out the following schtuff:

Chocolate for melting

Wilton garland marker (http://www.wilton.com/store/site/product.cfm?id=3E30D6CC-475A-BAC0-58FEDC73887B09DD&killnav=1)

Tape

Wide straws

Wax paper

Table knife

Sharp knife

Ruler

This is the part where we really improvise. Put a piece of wax paper on your work surface. Assemble your garland marker to a size called, “looks right.” (Poinky part facing up) Put one straw on each end of the bendy part of the garland marker. Move the other end of the straws until they are touching or almost touching and tape them to the wax paper so they don’t move. Take another straw (or trim one of the other ones before taping. That’s what my cheap tail did.) and clip off a piece to the length of “that’ll work.” Place the short straw in between the other two. Confused yet? No worries, I took a picture. It should look like this:

Look like tail you’d chase yet?

Before you melt the chocolate, read how to make the tail so you can move as quickly as you need to before the chocolate sets up. Even though my sentence will say, “Melt the chocolate,” don’t do it yet; don’t believe me, I lie.

Melt the chocolate. Pour the chocolate into the mold to a depth you are comfortable with. Too thin and it may break. Too thick and you’ll be on a sugar high until your trainer uses lunges to cleanse it out of you.

Let the chocolate cool a bit, but NOT completely. Once it  firms up a bit (but not completely hard), use the ruler and the table knife to score it into a diamond/criss cross pattern. Do NOT cut all the way through or you’ll have to start over. I am not responsible for do-overs. Now, let the chocolate harden completely and remove the mold from around the tail. Use a sharp knife to carefully remove stray bits of chocolate.

Thank the chicklet for her services, promise her you’ll pay for her carpal tunnel surgery later in life, and carefully place the beaver on the board. Use a round tip and pipe the eyes. Using the black fondant, cut small circles and place them in the appropriate pupil place, AKA “about there.” Cut a small triangle and place it in the proboscis area. Cut two small rectangles of white fondant and put them in the chopper area.

Realize that you have 5 minutes before the beaver leaves to build a dam, smear green buttercream on the board and pipe extraordinarily long grass. Consider it the beaver stocking up on vegetation for the winter. Place tail on the board in the buttage area, wave bye-bye to it, and wish it luck on its two hour car trip. Don’t tell it a horde of college kids who are always hungry and love free food almost more than checks from parents await it, should it survive the trip under the watchful eye of Mattimeo, the chinchilla.


Good thing I didn’t name him.

Buh Bye, Beaver Boy!

Eat Your Heart Out

16 Jan

Whew! Everyone make it into 2011 okay? We didn’t leave anyone behind, did we? Woo-eee, what a ride! Have you been wondering where I am, if I’m okay, if I gave it all up to become Diddy’s personal assistant? Naw. I’ve been around. I’ve been hanging. With my peeps. Little peeps, big peeps, annoying peeps, and Little Bo Peeps. Or doing endless college assignments, picking up after those-who-are-old-enough-to-clean-up-after-themselves-dangit! and baking, baking, baking! Whatev.

I feel like I should have written posts for a year before publishing the first one. The thing is, you get them hot off the presses and right outta my kitchen. That makes it kinda tough to make a post about a holiday cake when the holiday has just passed. After all, I make my stuff as close to the day as possible. Which means, by the time the kiddos head back to the Ivy League, the holiday is but a distant memory except for the mess they left behind. Luckily for me, I have an ace up my sleeve. Okay, a heart, but still- I’m ready ahead of time for the next holiday.

This time, let’s do something for the less experienced among us. That right, rank amateurs, step on up! If your idea of making a birthday cake involves sticking candles in a cake covered with canned frosting and still in the pan you baked it in, holla! This one’s for you!

Swanky Heart Cake

I actually wrote this a few years back for a friend. I was just beginning my cake journey. Everybody say, “Awww!”

Okay, let’s get to it.

 Bake one 8 inch round cake AND one 8 inch square cake. Let cool for a bit and then remove from pans.

(Chocolate or Cherry Chip would go well.)

Make 2 batches buttercream pure white icing. Set aside approximately 1 ½ c. and tint it pink. The pink should be the consistency for piping. (This assumes your recipe takes 1 lb. of powdered sugar.)

Leave the remaining buttercream white at a consistency for frosting the cake with the exception of approximately 1 ½ c. for piping (make the 1 ½ c. the consistency for piping).

 Place the square cake on cake board, making sure one corner of the cake points to the bottom middle of the cake board and attaching with a dab of icing underneath to keep it in place.

Cut  the round cake exactly in half. 

Frost the cut edges of the round cake and 2 adjoining sides of the square cake. Place one cut side of round cake to one frosted edge of the square cake. Press together until it holds. Repeat with other half of round cake and other side of square cake.

So I’m not that great at fussing with shapes using a computer. *shrug* Close enough.

Using a heart shaped cardboard template covered in plastic wrap, place it in the center of the cake, making sure the point of the template matches the point of the heart cake. Go ahead and mark this space by white creating shells around it or just leave it in place to remind you not to frost there.

Crumb coat the rest of the cake white, let the icing crust and then smooth with your preferred method. If the round and square cake do not match exactly in size, fill it out with extra frosting to make it even and look almost seamless. The finish coat will finish the job of hiding the seams.

Finishing icing the cake with white, let crust, and smooth with your preferred method. You can use an icing comb on the sides of the cake at this time if you like. However, remember you must have a thick coat of icing to use the comb.

Thin a little of the pink frosting to spreading consistency and spread it in the middle-following the heart template. Smooth the pink as best you can. You do the pink last because it’s a little tough to cover pink with white, but not white with pink. Keep checking that it is lining up with the point and curves of the top edge of the cake- you don’t want an off-center heart in the middle.

Using a star tip (a bigger one works fine for the borders but use a little smaller one for the heart center) and white frosting, pipe shells to outline the top of the cake and the middle heart shape.

Again using a star tip, pipe the bottom border with shells and pink frosting.

Cut one Hershey bar into smallish chunks and place around bottom border and on top of center heart shape.

Fill in between the top white shell border and the inner shells outlining the center heart with cherry pie filling. Use a large eating spoon (AKA soup spoon) and be gentle so you don’t glop it where you don’t want it.

Melt another Hershey bar and put it in a squeeze bottle or disposable piping bag. Drizzle melted chocolate on the board in whatever way you like. Alternatively, you can do this with a spoon but your drizzles won’t be as small or as exact as you would like.

Finis! Cut, Enjoy, and Give away the leftovers!

Close but no Cigar

17 Nov

Consistency, consistency, consistency. Whether it’s buttercream, fondant, or the finished product, caking is all about consistency. Which I don’t have. And I’m pretty sure I may never have- but that could be the scale talking. Ask fellow cakers how they got so good and how they learned to turn out a consistent product and every one, and I mean every single one, will tell you, “Practice, practice, practice.” Ahhh, but my scale says I’ve practiced far too much. My doc will tell you the same, but his scale needs fixed ‘cause there’s no way I’m that much. No… flippin’… way.

So you tell these lovely cakers that you can’t hack more cake sitting around and they tell you, “Use dummies. Decorate on the side of a box or pan.” Okay, the dummy thing. I’m a dummy with dummies.

 (See this post: https://2chickscakesandcatering.wordpress.com/2009/10/03/fake-it-%e2%80%98til-you-make-it/)

 Aside from that, dummies don’t work for everything unless you want to spend a lot of money and be personally responsible for killing off the wildlife in a 1000 ft. radius of your nearest landfill because once you shape Styrofoam, there’s no putting it back to the original and you will never need that exact shape again.

 Then they tell you to give away your practice cakes. The problem with this is:

1. I don’t know that many people and even they’re sick of cake.

2. It is highly unlikely in this current society of weirdos and freaks that I’m going to walk into a nursing home, fire department, school, whatever, and give away cake. This little town thinks I am odd enough as it is; I don’t need a total shunning happening. “Here comes the crazy lady with more cake. Don’t make eye contact. Just walk away, quickly.”

3. It does not make sense to me to continually give free cake to the people who are your target market. Why would they buy when they can just wait and get free cake the next time I practice? I see lots of “I’ll buy the ingredients and you can get the practice” conversations in my future with this route.

4. It’s obvious I have no solid solution so let’s move on, shall weeee????

I tend to run across cake pans at thrift stores. Of course, I have to buy them. One of my finds is this pan:

http://www.cakesnkitchens.com/servlet/the-725/wilton-holiday-candlelit-3d/Detail

If you don’t have it already, you’ll have to get it used somewhere ‘cause this is older than my kids and my kids aren’t kids anymore, if ya know what I mean. I got this home and thought, “I bet this would make a good body” and felt another practice cake comin’ on. I was able to wait a few weeks, but sure enough, another cake was acomin’. Unfortunately, the execution was a tad problematic. I should have stopped after trying to get the black fondant to work for 2 hours. Yeah. Two hours. On the other hand, my bat wings are looking better.

At first, it was going to be a Bobcat mascot; but I’d already made a Rufus cake this Fall. I’ll show you that one another time. Never heard of him? Here ya go: http://www.ohioalumni.org/bobcats-mascots Instead, I had what I thought was wonderful idea, and it would have been, had I been able to get along with fondant that day.

The directions for this cake don’t say to fill the core tube thingy, but I did anyway. I dunno if Wilton learned later how handy a core of cake is and then the changed the instructions for the newer pans or what, but I filled mine. I used a cream cheese pound cake recipe so it would be sturdy, but having that core still seemed a wee bit necessary to me. Enough explanations, let’s get caking!

Using a paring knife, I trimmed off some of the bumps so it would be easier to frost smooth. I also whacked off the top so it would (hopefully) look like shoulders.

After that, I set it aside and started working on the head and limbs. I made a ball from crispy treats mixed with a little modeling chocolate (optional, but it worked really well to hold everything together tightly). I stuck a skewer in the head so I could install it and checked it for fit/size.

The arms/hands and the feet/legs were shaped from trial and error and previous experience with cakes. They looked rather penile but I kept on trucking and turned the radio on to get my mind out of the gutter.

 When the crispy treats were cool and solidified, I used a small grater to smooth the surfaces a bit more. I got that little tip from cakecentral and it worked fabulously! I’d give you the link but the site is still having issues so I seriously doubt I can find the thread again.

I stuck skewers in the arms before they were too solid to poke. I tried them on the cake for size. It turns out I am occasionally good size guesser, as these were perfect.

Yeah, I know. Penises on a stick. Think I could sell these at the fair? Hey, a gal’s gotta do what a gal’s gotta do, right? Uh hem. I better turn that radio up louder, huh?

Here they are, awaiting further construction:

I crumbcoated everything- no easy feat with the undersides of everything- let it crust, and then the final coat and smoothing.
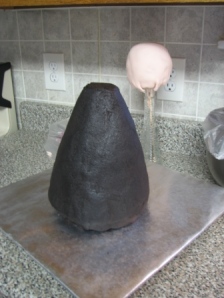
It’s time to drag out the fondant. As the above picture shows, I started with the head and that’s when it all started to go to heck in a fondant bucket. As you can see, I had a few problems covering the head smoothly. I used a new fondant recipe and it really really really didn’t work out. I’d tell you the recipe, or link to it, but I think it was possibly user error or a combination of user error and recipe poster error. Either way, the stuff would not stretch for God or country or nothin’. It would stretch a little if I heated it, but never ever ever did it stretch enough to make is usable for anything other than flat cut outs.  

I set aside the head thinking I would get back to it in a bit to fix it because maybe the fondant was tired and needed to rest a bit. One two hour black fondant kneading session later, and it was too stiff to fix it. I told myself to stop worrying about it right now and move on. THIS is where I go wrong with cakes; why I lack consistency in my work. I should have kept at that head until it was fixed. I didn’t want to get so frustrated that the rest of the cake would go to crap, too; so I took a deep breath, turned up the radio a little more, and moved on to the torso.

The black fondant is why we had leftovers for dinner that night. After two hours of kneading and tweaking the fondant, I gave up using it by itself. I added more water, more glycerin, more corn syrup, and more powdered sugar.  I melted marshmallows and added it in, I added marshmallow fluff, I tried corn starch and heating it up in the microwave.  I even walked away and let it rest for about 15 minutes, but no go. This stuff would shred when I tried to roll it out, no matter what I did to it. I finally sucked it up and mixed my remaining Fondarific in with it. So sad. No more Fondarific. 😦 That finally got it workable enough to use so I covered the torso and appendages with it and walked away for the evening, still hoping the cake fairies would arrive in the dark of night and fix the head. Failing that, surely the wrinkles would be hidden when the head was installed on the torso. Or the collar of the uniform would cover it, but something surely would save that head. Right?


Wrong. Very wrong. This far into it, the next morning I pushed on, telling myself it was a learning experience at this point and I didn’t ever have to show it to anyone if it sucked when I was finished. So, of course, I blog about it.

I used fondant from a previous batch made with a different recipe and extruded the hair, made the facial features, the uniform, and the cutest lil spats I ever did see.
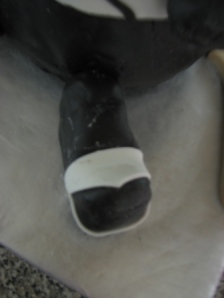
The close up shows the ongoing problem with the fondant. As it dried it started cracking. One of the arms eventually split and fell off. I suppose the crispy treats sucked the moisture out of it. Or the fondant just hates me. Whatever.

 I didn’t have the heart to finish the shoulder nests.

He developed an acne scar looking divot on his face. I have no idea why. Maybe prom was the next day or something.

In the end, Jack (for that was his name) never made a public appearance. There was no way that I could find to fix his flaws, which were numerous, glaring, and ugly. I tried sealing him a box, hoping the fondant would soften without air. After that, I put him the fridge for a few hours hoping that when I took him out, he would start to condense and that would soften the fondant. I guess that only happens when you don’t want it to, ‘cause it sure didn’t work for poor Jack. I gave up and didn’t even try to add more crispy treats to make his legs look more natural or add the white fondant for gloves on his hands. He looked so cute from far away, sitting there on the counter- like a real doll so both creepy and cute. However, up close, he looked like the cake failure he was.

Three days later, I ripped him apart, removed all the fondant, re-iced the torso, and sliced him up for the family’s snacking needs.

R.I.P., Jack.

This Just In

2 Aug

This week is gonna be bussssyyy. Groceries, periodontist, the Chicklet’s birthday, last week of class, and possibly Primitive Boy moving out of the manse. Y’all are lucky I’m here at all. LOL I’d like to find the highly degreed person who decides students should have one less day to complete the work plus an extra assignment that includes a long paper for the last week of class and have a “chat” with that person. Do they really think we worked on that paper all quarter as suggested? Yeah, right. Also, I would like that person to know that some of us notice things like the abstract is due before the final paper and the link you gave the students that explains an abstract says clearly that the abstract is written last. Cart before the horse or forcing students to turn in work before it’s officially due so the professor can knock off work a couple of days early? You decide. I’ll keep my opinion to myself until they slap that degree in my hand while I’m shaking hands with someone Important that I’ve never met while trying to smile and face a photographer who apparently is getting a shot up my gown from the looks of his position below. But I digress. Once again. I’m good at that, at least.

I blew off some things I didn’t want to do anyway and updated our PowerPoint portfolio. (Yes, it really is spelled that way.) We would LOVE it if you’d look at it and leave comments with your opinions. How is the layout? Colors? Organization? The fonts? (I kept them all in the Lucida family because Primitive Boy’s explanation about fonts and foots and all that stuff made my eyes cross. Never ask the opinion of someone who wears a t-shirt that says, “All I care about is ink, fonts, and crap like that.” Just shut up and kern for me, k?) I took out the character cakes and such even though they were all made as gifts. No sense in angering the mouse, eh? I think we’re far enough along in this adventure and therefore have enough cakes in the portfolio without them, anyway. We want to know it all- the good, the bad, the ugly, the few, the proud, the chosen…oops! Wrong blog for that.

Let us know what you think while I’m off pretending to be a grown up. Or working on my tan at the beach. Whichever.

 2Chicks Cake PowerPoint

Truffle Board

14 Jun

Whew! Modem problems, graduations, final exams, and cakes have kept me away far too long! Fear not. I have not forgotten nor forsaken you, my lovely cake friends. I have files upon files filled with scrumptious cake happenings to show you, starting with this:

For the two people who haven’t heard, one of the latest crazes in cakes is cake truffles. Please, call them truffles. They are time consuming to make and if we keep calling them cake balls no one is going to want to pay what they’re worth. Think marketing, k? Besides, some people are immature and snicker when you say, “balls.” 

Cake truffles are a great way to use leftover cake, but they can also be made with an entire cake. You will, however, have to invest mondo amounts of time to do an entire cake. Just sayin’. Plan accordingly. Basically, you smoosh the cake into crumbs, add icing, roll into ball shapes, and dip the truffles in chocolate. You can use any combination of flavors that strikes your fancy. You can add flavored oils to them if you like. You can use up leftover frosting. You can magically use vanilla cake and turn it into chocolate cake just by using chocolate frosting. They can be frozen. Watch out for bloom, though. If they bloom, thaw them until they are dry and sift either confectioner’s sugar for white chocolate or cocoa for regular chocolate over them to cover up the white spots. The spots aren’t harmful, just fugly.  I actually prefer them frozen. I should warn you: they are addictive. These are not “I need to fit into a smaller size” treats.

I’ve figured out all sorts of things along the way, but there was one issue left and I think I may have solved it. How does one set them down after dipping? I’m jumping ahead, though. Let’s start at the beginning.

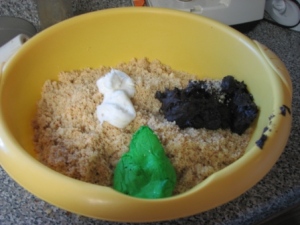
The cake needs to be broken up into small pieces. It should be bigger than grains of sand, but smaller than chunks. Chunks will make it difficult to roll a smooth truffle. The easiest way I’ve found to do this is in my food processor.

Now add the buttercream. Some people use canned frosting, but the best flavor is with homemade, in my opinion. Here, I’m using bits of leftover frosting from other projects.

See the dark chocolate frosting? That’s what is going to turn this vanilla into chocolate.

The amount of frosting to use varies from cake to cake. Start small and add more as needed. Don’t go by the amount shown above as the bowl is potato salad for a family reunion huge. Start with one of the dollops shown and go from there. Test it by rolling it into a ball shape. You want it to firmly hold together without cracking.

(I added cocoa to this batch to make it more chocolately and to correct adding too much frosting.)

It will probably stick to your hands a bit once you’ve rolled 3 or 4 of them.

(Shoes are for sissies or paid orders, LOL)

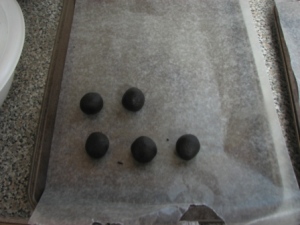
Once you’ve reached the correct consistency, roll all of the truffles and as you roll them place them on a waxed paper lined cookie sheet.

When the sheet is full (or you run out of mix, whatever happens first), put them in the freezer. At this point you can freeze them until they are solid, toss them in a Ziploc type bag, put the bag in the freezer, and stop here until you are ready to dip them. This is handy if you don’t want to risk chocolate bloom but don’t have time to do it all right now.

Once you’re ready to dip, have the paper lined cookie sheets handy. I like to start with an empty one so I’m not maneuvering around the undipped ones. However, with my latest method, this isn’t a problem.

The type of chocolate you choose is personal preference. You can use chocolate chips, candy melts, leftover Easter bunnies, or go high class and use couverture (that’s so fancy I don’t know how to spell it). Let your budget and personal preference guide the way. The important thing here is that the chocolate must be tempered. It what you use isn’t already tempered, you’ll have to learn how to do that first. A topic for another day and for someone much more experienced than me.

Note: Chocolate and moisture do not mix. It will make the chocolate seize. You will know it has seized because it won’t be all melty and smooth anymore. You can try to rescue seized chocolate by stirring in shortening a teaspoon or so at a time until it returns to the correct consistency.

Now that you know that, chop the chocolate.

Hang in there, we’re almost done. It’s time to melt the chocolate. There are three methods to accomplish this:

Double boiler (see above pic)

Microwave (which is difficult for me to achieve the perfect temp: melted but not burned)

Crock pot type melting device (see below pic)

(The pictures I’m using are a combination of batches. The ones shown above are coconut flavored cake truffles.)

Get the truffles from the freezer while you are melting the chocolate. If you dip them when they are too cold, the chocolate will crack so you want them solid enough to hold together while dipping, but not too solid or you’ll have to dip twice to cover cracks. Dip to your heart’s content, let the chocolate set up, and they’re finished.

This brings me to my dipping experiment. As I said, I don’t have a lot of luck moving the truffle from the chocolate dipping area to the cookie sheet. I have tried all sorts of devices: toothpick, fork, spoon, and several special instruments made for chocolate dipping. None of them work to my satisfaction.  Tapping the instrument against the side of the pan helps the excess drip off but you can’t do that with a toothpick. If you don’t use a toothpick, you have to cover them completely with chocolate, which means there’s no uncovered “blow hole” to prevent blow outs. It’s a dilemma.

Instead of using cookie sheets to place them on to harden, get out your cooling racks and cover them with waxed paper. This method uses more toothpicks, but sometimes sacrifices must be made. Using one of the toothpicks, poke holes into the waxed paper.

Hopefully you can see the spaced holes in the picture. Dip the truffle into the chocolate, covering almost completely. Remember: you want a small spot left uncovered. The sensible place for this is near the toothpick which you stick into the middle of the bottom of the truffle so it won’t be seen unless someone has an uncontrollable urge to look at truffle butts or something.

(The uncovered area should be a lot smaller than shown above. This picture also shows the difficulty in dipping when the chocolate level gets low.)

Now that the truffle is dipped, you are going to put the toothpick (still stuck in the truffle) into one of the holes in the waxed paper. It’s easier to start in the center of the rack and work your way outwards.  One hand holds the toothpick from above while the other waits underneath the rack to receive the toothpick. Move slower than you think so it’s doesn’t drop from one hand to the other.


Place the toothpick into the hole, pause, put your other hand underneath and grasp the part of the toothpick sticking through the hole. Remove the hand that’s above the rack, and with the hand that’s grasping the toothpick below the rack, lower the truffle until it is sitting on the waxed paper. Let go of the toothpick and slowly remove your hand from beneath the rack.

Ta da!

Your truffle is now sitting on the rack and it hasn’t rolled anywhere, you didn’t scrape off chocolate getting it from the toothpick to the rack, and your fingers aren’t chocolate covered in the process.

You can dip about 6 truffles and then the chocolate is set enough on the finished truffles to enable easy removal of the toothpicks so you can reuse them for the rest of the truffle dipping.

Other than using more toothpicks, the only problem I have with this method is removing the chocolate that pools at the bottom of the truffle. When using the cookie sheet method, you can score around the bottom of the truffle before the chocolate is completely set. You can’t do that with this method. However, I always had to fine tune them with the other method, so it’s no biggie for me.

Once the chocolate is completely set and all the toothpicks are removed (you can place the racks in the fridge or freezer to hurry this process), use a cookie sheet (rimless is best) and slowly pull the waxed paper off the rack onto the cookie sheet. Most of your truffles should stay stuck to the waxed paper. If not, as long as the chocolate is firmly set, it’s not a problem. Now that they are on a solid surface, you can trim the pooled chocolate with the knife of your choice.

Eat. Enjoy. Place in mini cupcake wrappers and impress your friends with their elegance.

Just don’t try this unless it’s Halloween because people freak out far too easy and won’t eat them.


Ker-shoe! Excuse me while I make amends.

3 May

Shoe cakes are still enjoying some popularity and I am not immune. Since I still can’t walk in heels; in fact, every time I tried to wear them to school it was guaranteed that I would fall in the halls (and I had an awesome knack for somehow knowing just when they would be freshly waxed).  I naturally lean more towards Converse and less towards, as Carrie says, “the big girl shoes.” I also had to make up for this monstrosity:


It seems like a dream. You see, I once worked for “the man.” Forty hours every week. Plus college, plus marching band season, plus, plus, plus. I was a tad worn, a tad frustrated, a tad oppressed, a tad plum crazy. Yeah. That tends to show up in cake form when you have a few hours to get it done so you can go to bed and get those golden 5 hours of sleep before those-who-sign-your-check insist you be upright and at your desk again.

I wouldn’t call this cake a disaster. It’s all in one piece. The buttercream and fondant are smooth. The colors are pleasing. It’s just missing something. Stuff. It looks plain, like a grocery store cake. I suppose the purchased dude doesn’t help with that, either. Eh, looking back, it’s an okay cake; but who wants to make okay? I want spectacular, wow!, cool, awesome, how’d ya do that? kind of work coming from my cakeworld. I couldn’t do that right away (see above crazy life), but I determined I would fix this, someday. A shoe cake fit the bill, talked the talk, and walked the walk.

With such popularity, you think there would be a template online for this. Nope. Maybe there is now, but I sure couldn’t find one when I needed it. I’m lucky that way.  Left to my own devices/talent/imagination, I pondered my feet for a moment and realized my feet were still big. Not gigantic-special-order-shoes big, but there are no tiny dainties dangling from my spider veined ankles, either.  My feet, dear readers, are the perfect cake size. At long last, a reason for my suffering! All those years of my parents threatening to just strap boxes to feet have finally paid off!

Hmm, problem. Shoes are dirty. Shoes are smelly. Shoes are not food safe. Well, maybe if you’re an ogre or a goat or something; but otherwise it’s best to keep de feet away from the mouth whether you’re eating or conversating. With this dilemma began many tracings, swappings, and clean paperings to keep anything shoe or foot related away from the cake. I feel it’s important for you to know that ‘cause that’s how rumors start. You know who you are. Silly gossips, rumors are for turds.

As my biz math teacher says, with a hop no less, “Okay, here we go.”

The Tracing of the Shoe:

I wanted to have enough cake to carve away so I drew what would be called a seam allowance if we were sewing.

Notes on template: Carve under toe area, Carve under arch

At least, I think that’s what that says.

To help carve the sides, I made one more template:

Note that once again, I added a seam allowance.

I also took pictures of every side of the shoe for reference.

Don’t set the scraps aside yet. You still need an upper. One upper, coming upper!

Now that we have the basic shape, it’s time to fine tune it. The tongue area needs to be slanted more and we have to create a place to put a foot in- if we were going to put a foot in, which we’re not; but it’s supposed to look like you could. It’s all part of the illusion, folks.

“Gluing” more on to help create the slant:

I remembered to carve under the toe, but I decided against carving the arch. I didn’t want fallen arches and I was fairly sure that’s what would happen if I carved there and didn’t replace it with support. If I have to replace what I took away, why not leave it there and save myself some hassle?

I used a cookie cutter for the foot hole? Is that’s what it’s called? I doubt it, but today let’s pretend that’s its name, k? The depth of the hole may need some tweaking as you progress. Too shallow and it looks stupid. Too deep and you risk the outer sides falling apart. Start shallow and work your way deeper as needed, just like a blind date.

Once the cake is carved as close to your satisfaction as it’s going to get, crumb coat and decorate.

Looks like a clog so far. Fear not, cake friends! Have faith in the power of the caker!

Sing along with me: A fondanting we will go, a fondanting we will go….

Bubble, bubble, toil and trouble! I’ll smooth you, my pretty! Just you wait and see!

The tongue is quite a bit thicker on one end. Go ahead, check out your own ‘chews.

Don’t forget to narrow the end of the lace by rolling it between your fingers.


(cut two of the above shape)

I used a pastry wheel to quilt lines all along the cake, but I didn’t take pictures of that. I think you’ve seen enough of my man hands for awhile.

For a faux glimpse of the insole:

That’s your basic plain shoe. The rest of the décor is up to your crafty imagination. I added side stripes/arches and a bald dude. A cute bald dude, but bald nonetheless.

Yeah, I could not have done this in the three hours at night I had after working that “real” job.

Real jobs are overrated.

 I say marry middle-class and coast, baby!

Great Balls of Fire!

24 Jan

Oy Vey! I always thought it would be the mixer. My expensive, once in a lifetime, too good to be true, I’m not worthy, Kitchen Aid mixer. Especially since hubby bought it an attachment for Christmas and I’m weird enough to think that it doesn’t matter if it’s okay with the manufacturer, asking a mixer to do anything other than mix is asking for a meltdown. But it wasn’t. Sure, she gave off a bit of that lovely electrical burning smell earlier in the day for no good reason, but all I was asking her to do is to mix the same dang frosting recipe she’s been mixing for 6 months, so I blotted that smell out of my mind. Maybe the smell wasn’t the Kitchen Aid? Naw, doesn’t matter, moving on. I’ve got cakin’ to do!

Later that afternoon, there was a noise. Kind of a popping sound. I was in the dining room, tuna breath was in the kitchen. He looked alarmed and kind of twitched a bit. Huh, better check it out if tuna breath is skeered. It sounded like it came from the sitting room or beyond. I took a quick look, smelled something odd again, thought it smelled electrical in nature; but again, no evidence of anything awry so I dismissed it as, “Man, I really gotta get out of the house soon.” After all, the farthest I’d ventured beyond the walls of the casa aside from the one minute run ‘cause it’s cold foray to check the mailbox was Monday and today was Thursday. Definitely time to get back into real life and do some shopping or something. Yeah, I know. I still get snail mail. Not good stuff anymore, but nonetheless, I get snail mail. I need to get on better propaganda lists or something since I get nothing interesting in the mail, but I digress.

Electrical smell, popping noise, can’t find anything, may be losing my mind.  Just another day in the manse so back to caking I go.  Half an hour later, the oven timer gives that annoying beep. You know, the one that sounds like a major piece of equipment in the hospital is signaling someone is dying kind of sound. Time to check the cake. Nope, nowhere near done. It’s still all jiggly. Set the timer for another 20 minutes. Better, but the center still looks like my thighs when I run. Tuna breath has settled down (meaning he’s in my way) so all is well in my world. Or so I thought. The timer sounds once more, it’s still not quite done. I think, “This is taking a long time. I guess I should have used baking strips, a flower nail, or something in that bad boy” and go back to caking. Okay, caking and emailing the Frosting Chick. Someone has to keep her sane and let her know there’s still caking in the world while she’s stuck in the pod. I’m good like that. Nothing like a good day of torturing corporate flunkies with tales of cake and housework and annoying life mates. 

Ten minutes later and the cake smells like it’s burning. It must be done. After all, everyone’s chocolate cake smells like that when it’s done, right? No? It’s just me? *Sigh* I guess the “Perfect Chocolate Cake“ recipe search continues. Until then, let’s check the cake once more, k? Huh. What’s that sizzling sound? Suddenly the oven sounds like I’m makin’ bacon. Now either I really have lost my mind or something’s up. I’ve really isolated myself from the cruel world too long because now I’m associating a brief mention of how chocolate and bacon is the “in” thing from earlier in the week chat conversations with the cake in the oven or something is seriously awry. Yeah, it must be me going bonkers. Open the oven, crazy lady, and check the cake. I open the door aaannnnd there’s fire down below. Whaaat?

It wasn’t a big fire. No need to run for the extinguisher (yeah, right. Like I have one.) No need to dial 911 and get the beefy boys. No need to even call beefy boy’s woman and ask if she thinks I should have a meet up with them. It was actually fascinating. A small flame on the front left of the element. Sizzling away and throwing sparks like, like, well, like a sparkler. This is God getting me back for buying sparklers for the chicklet last July. Sure, she’s way old enough to handle them now and she did miss out on all that fun because I’m overprotective, so what’s the harm now? Evidently, I hadn’t built up enough karma or something because this is the harm. Fire in the oven and cake due. Holy schmoly. Look at her go. Oh, crap! I better get the cake out of there, huh? Yeah, I’m quick on the uptake. Shiny objects and all that.

I’m dumb enough to stand there and look at it burn for a couple more minutes while tuna breath has headed for the hills. I finally realized that perhaps it might stop burning if, I don’t know, I turned off the oven or something. You think? I considered getting the camera and taking blog pictures but quickly dismissed that thought as another reason I really need to get out of the house more often. I switch off the oven, pick up the phone, and call my Mr. Fix It at the office. Big fat help he was. He needs the model number. And that would be where? I dunno. Probably in the oven somewhere. Yeah, I’m not sticking my big head in there, the thing is still sizzling like I used to do on a Friday night at the skating rink. At least the fire is gone. The smoke aroma isn’t too bad, so I put the cake back in and hope for the best. *Shrug* At this point, if the residual heat in the oven doesn’t finish baking it I haven’t lost any more than if I left it on the counter.

Mamma needs two things at this point: a model number and the use of someone’s oven. I still have cupcake batter sitting on the counter and I dunno how long that stuff can sit before it’s no longer fit to use. First, the model number. Mr. Fix It will be home in a couple of hours, which means if I find that blessed number in the next hour maybe he’ll take pity on me and pick up an element on the way home.

You should know I’m an organized person, generally. I’m not real pack-ratty, but I do tend to keep stuff that might be useful. Like warranties and guarantees. I’m smart like that. Small problem. It’s not an area of the file cabinet I venture into very often. I long ago moved that kind of stuff to its own drawer in the cabinet. Every January I clean the files to prepare for the new year and the dreaded tax/FAFSA season. I’m so good that this yearly cleaning has already been done, just not the particular drawer I need. There is no kidding 6 file folders and a shoe box stuffed with stuff. It’s not pretty. Answering machines, curling irons, bikes from 10 years ago- it’s all in there. What are the odds the stove papers are lurking in a dark corner of that drawer? 20 minutes later, I know the odds are very low. Just when you think you save way the heck too much stuff, you realize you didn’t save the one thing you need right now.  No dice on the paperwork so no hope of getting it fixed tonight.

Being the techno-savvy cake making mamma that I am, I put out a call for help on Facebook. The place where I can ask a favor without having to actually talk to a human being. Problem though. The person for whom I am creating this week is also on Facebook. I can’t freak her out. Therefore, I change my status to, “Who’s home? I’ve got a problem and I need an easy favor.” After that, I decide to pretend I live in the ‘50’s and call a neighbor to see if a little borrowing of an appliance is possible. She’s not home, of course. No one is. Everyone is snug in their pods except for those who I swear spend 24/7 driving around so as to try to annihilate me or, failing that, aggravate the heck out of me by driving slowly/erratically/while on the phone in the front of me. Either way, no oven for me.  Buddy Boy Blast from the Past catches me on chat and asks if he can be of assistance. Could it be? A hero in a hero-less land? He’s one state over. He suggests I get out my Easy Bake Oven. Yeah, no.  Big help. I don’t know why we keep him around. Pity, I guess.

I brave the oven and look for the model number. On the oven door? On the front of the body when you open the oven door? Inside the drawer? On the instrument panel? On the one side I can see without moving the stove? In the oven? Nope, nope, nope, nope, nope, and nope. Maybe Mr. Fix It is right and it’s on the back of the stove. I’m not moving that thing- there’s a cake in the kitchen and I’m still not sure it’s done! I don’t care if you can now bounce around like your favorite kitchen activity is trampoline sky diving, don’t be messing around in my kitchen with a cake in the house!

Finally, Corporate America disperses its human contents back into the world, and a free oven is found. Huzzah! Cupcakes are baked, cake is done, if all a little extra crusty from the drama, and life can continue. Mr. Fix It locates the model number. Heaven forbid, but should you ever need to know where the model number is located on a 20 some years old GE electric stove, try pulling out the drawer and looking on the body of the stove, on the right. Shut up. The important thing is that it was located.

Before:


Thankfully, I keep a clean oven or these pictures would not be possible, if you know what I mean.

Where the fire was located when I finally discovered the problem:

See the ashy looking stuff that wraps around the element? Sparkler juice.

That’s supposed to be all in one piece, y’all. He said I did a darned good job of breaking it. What can I say? It’s all or nothing here, baby!

Check out Woodstock in the background looking dismayed and amazed.

 Mr. Fix It to the delayed, but still much needed rescue:

No, they don’t just pull out and plug back in like burners. ‘Cause that would be too easy.

But will it heat up? You know, my cake karma has really taken a hit lately, so I wouldn’t be surprised…

Whoo hoo! We’ve achieved red hot! Is it too hot? Too cold? Uneven heat? Mr. Fix It says it’s just perfect, but I’m going to test it with an oven thermometer next week when Corporate America steals my buds once again. In other words, secretly. No need to hurt Mr. Fix It’s feelings. Gotta keep him happy ‘cause you never know what’s going to blow up next around here. He was even kind enough to make fish sticks and reheat pizza in the oven today to get rid of any “new electrical appliance part” smells that might be lurking in the oven. Now that’s love, ain’t it?

Yes, he does still have to do something for me for Valentine’s Day. I have to keep him on his toes, after all.

By the way: Frosting Chick asked me if I took pictures while it was aflame. Either we’re both crazy in this together, or that’s a normal reaction? I’m shooting for both crazy. It’s the only thing that makes sense right now.

I’m back in action, y’all! Yee haw!

P.S.- I told you I wouldn’t get a new stove out of this. You know who you are. 😉

Meet Me Under the Mistletoe

8 Dec

Betcha thought I forgot about ya’, didn’t ya’? Nope. Just “busy, busy, busy” to use those immortal magician’s words. 

For a change, I thought I’d post a holiday themed cake before the holiday. I have a few holiday cake pictures in my collection but since they aren’t created until the week of the holiday, it’s kind of hard to post them after the holiday and not look like I don’t know what the date is. I gotcha this time, though.

Way back when at the Farmers Market, we held a drawing for a free 6 inch cake. The coupon was cashed in recently and the winner wanted a chocolate cake with chocolate mint frosting. The cake was for a church event and she liked the outdoors and Christmas. From there, the rest was up to me. The cake was supposed to be a simple design, per the rules, so I restrained myself and designed a mistletoe cake, thereby giving her both the outdoors and Christmas on one cake. I’m smart like that.

We start with the obvious: a 6 inch cake. This one is actually 2 six inch cakes stacked. That’s what my recipe makes, so why not use all the cake? My freezer is plum full of cake truffles already so I have no need for more extra cake. I have to have room for other holiday goodies in there, doncha know.

Level the cakes (level-ish, according to the pictures)


Fill and stack the cakes:

I put a dowel down the center of my cake because, as you see, it’s a bit tipsy.

Crumb coat (stop me if you’ve heard this before).

Finish coat:

Lacquer coat- wait, that’s cars; this is cake. Get a ruler and draw diamond shapes (ish, again. Dear Santa, for Christmas I would like a diamond impression mat because now even hubster cannot draw it.)

(We should have left it like that, but of course we didn’t.)

Try to figure out the circumference of a 6 inch cake, and then decide to wing it and cut a rectangular strip for the top edge of the cake. Roll it out 4 times until you remember to roll up the strip to move it onto the cake instead of picking it up while it’s flat and screaming in frustration when it rips.

Put the strip in its proper place on the cake.

Use white icing and a round tip to fancy up the intersections of the diamonds. Except you will use the smaller tip even if you think it’s not big enough because, as you see, the bigger tip looks like doody.

Between the mucked up diamond pattern and the gigant-o dots, I hope our winner doesn’t have her glasses on when I deliver this.

Next, cut out more leaves than you will ever use in this lifetime.

I scrounged around in my stuff to find the cutter. You can find it here:

http://www.wilton.com/store/site/product.cfm?id=3E30D6EB-475A-BAC0-5E5EF66C57041711&killnav=1

Dust them with sparkly type stuff.

Make teeny tiny balls of red fondant and dust them with sparkly type stuff, too. Or do what I did- use a pearl maker.

Arrange  leaves around bottom border of cake.

Arrange 3 leaves on top of cake.

Over-leaf the whole thing and remove the excess leaving the top no longer smooth and no longer able to be smoothed. Add red balls for berries on the top of the cake.

In person, it was centered. Seriously. It’s the picture that makes it look “off.” Dunno why. Ask my son, he’s the photographer. I’m sure it’s some really long technical explanation that will make you sorry you asked, but go ahead- ask. I double-dog dare you. My apologies also for the darkness of the shot. Again, ask the kiddo.

Decide the cake is “done enough for  this late at night” and go to bed wondering if you’ll remember to buy a box for it tomorrow so you can deliver it.

Two more weeks of this college class and then I promise to make perfect cakes again. Right after I buy a crap ton of gifts, wrap them, make 2 dozen confections for Christmas, and take a vow of poverty rather than work a 40 hour per week job that isn’t caking.

What do you mean it’s only 2 weeks until Christmas?

Aaaahhhhhhhh! Quick, somebody wrap something! Anything!

Twitter Gone Haywire

29 Nov

Birdhouses are so cute, aren’t they? Little homes for little critters. Someone’s mamma thought so, too, so he asked me to make one in cake-complete with critter. Armed with wild ideas and a Wilton house pan, I set forth to create mamma’s passion in cake-despite the horrible heat and humidity and a great lack of central air. The last part’s gonna be important. Remember it and be kind, k?

You can find the pan here:

http://www.wilton.com/store/site/product.cfm?id=3E3191DF-475A-BAC0-53BA3BD42B6F8C98&killnav=1

I made 4 houses and skewered them mightily to a double layered covered foam core board base. Yes, 4 houses. I wanted it to be square shaped and that takes 4 houses. Now you know why they were skewered mightily. So great did I skewer that the delivery sheet included a diagram for removal.

Everywhere there’s an arrow, there’s a skewer and they were all inserted at an angle and had to be pounded into the board below, with the exception of the one in the birdhouse door. Don’t put the birdhouse door skewer in just yet, though. We’ll do that later. Each house was torted and filled with cream cheese icing, and then the houses were glued together with more cream cheese icing. The whole shebang was then iced in cream cheese icing. Do you get the feeling cream cheese icing is important to the tale? That’s ‘cause it is.  Back to the cake:  I think that’s all you need to know before we get started on the décor. If not, holla’.

Once the cake is upright and sturdy, find a round object the size that you want the “hole” to be and press it into the cake to mark the area. Dig it out as much as needed.

From here, we start with the fondant. You will need white, teal, yellow, orange, and lilac fondant.  I made a mistake which I often make when adding gum-tex to fondant. I added it when the fondant was in the liquid stage instead of kneading it in once all the powdered sugar is added. This creates clumps. I dunno why, but is shore do. However, no problemo for this cake. It just adds to the authenticity of the wood look I’m creating. If you don’t like that look, add the gum-tex at the proper time.

Roll out the white fondant. Cut a circle the approximate size of the hole you created and stick it in there. It will get messed up, but do it anyway. I hate to muck up something alone. When that’s ready, compare your pan to the actual cake to check for size and then cut out 2 pieces of white fondant for the front and back using the pan as a guide. Mark the top and bottom edge of your pieces for even lines. Using a straight edged something that’s food safe, press board lines into the fondant. Now it’s ready to be applied to the cake. Expect the fondant to stretch. Just get it onto the cake the best you can and trim as needed. Press the fondant into the bird hole and smooth ‘til pretty.

Measure the sides of the cake from the bottom edge of the roof line down, cut 2 pieces of fondant, make the board lines again, and stick those onto the sides. Once those are on snugly, go ahead and put in the birdhouse door skewer.

I know you’re asking, “Why is the frosting so lumpy?” No air conditioning and cream cheese icing, that’s why.  Try not to obsess about it. Not a thing I can do about it but hope it doesn’t show thru the fondant so let’s move on to the fencing, huh? Cut out 4 more rectangles- each the width of the side where you will be placing the fence. The height is up to you. Cut these rectangles into boards- each the same width. Now you have sticks and they need turned into fence boards. To do this, cut the tops of each one at an angle like so:

The boards need joined, so cut rectangular strips to go across them once they are on the cake, measuring the circumference of the cake so you know how much you will need. You will need this amount twice. Apply the boards and then the joins to the cake like so:

As you can see, my fencing stops at the door. It was a height thing. Your results may vary.

Front, back, sides, fencing: it must be time for the roof. Wad up the rest of the white fondant, and seal it in a baggie to keep it fresh and soft. Roll out the teal fondant and cut circles- approximately a crap ton.

These will be applied similar to real shingles. Start at the bottom and work your way up.

Part way through, I realized it would work better if I also put shingles along the side before working upwards. This helped me plan the spacing. As you can see, you are going to work your way across the roof, placing the next row of shingles between the shingles of the previous row. Otherwise, it will look weird. Go ahead, go outside and check your own roof. The seams are staggered. They should be the same on a cake house, too.

Again, like a real roof, you have to cap it with a row of shingles:

While you have the teal out, go ahead and cut out the flower box. Roll out bits of white, yellow, and purple, and using a flower plunger cutter thingy, cut out flowers. Arrange all to your liking on the front of the house. Repeat for back, if desired.

So far, it’s been fairly simple: cut and apply, cut and apply. Now we’ll get down to the harder part: the bird. My bird is wacky, but that’s what the client asked for so that’s what he’ll get.  First the picture, then the explanation; at least as much as I remember. I used a picture to guide me and I found it on cakecentral in the galleries. Here he is in progress:

Roll one square teal oval for the body and head. Use the non-pointed end of a skewer to make his belly button.

Roll 2 white fondant balls for the eyes and cover those partially with teal for the eyelids.

For the feet, I used orange fondant and a flower cutter and removed the extra petals.

The wings were created from a rectangle. I rounded one end then used a pointed fondant tools to push in 2 areas on the other end to make it look similar to a wing.

The tuft of hair was created with a clay gun. I made a thin round strand, cut it in pieces, and then joined them together by squooshing.

The beak is 2 triangles of fondant. Before placing one triangle on top of the other, roll teeny balls for the teeth. Place the teeth on top of the bottom triangle, then place the top triangle and lightly press the whole shebang together. Press the non-pointed end of a skewer lightly into the beak to create the nostrils. After that, let it dry with 1/3 of it hanging over a low edge so it dries with a slight curve.

When all that is complete, mark the pupils with a black food marker and join all the pieces with piping gel. Keep the extra hair tufts in case of breakage. Let the food marker dry before you put it all together or you may be giving your bird the bird if it smears.

All that’s left now is put your wording on the board and place the bird. Ta-da! Not exactly a Rockin’ Robin in his ‘hood, but it’ll do.

To answer your remaining questions, the weather played a huge part in the pain-in-the-behind-ness of the creation of this cake. The frosting made everything slide. The fondant stretched out of shape and didn’t want to stay put. It was cream cheese frosting so I had to be very aware of how long it was out of the fridge, too. I kept putting the cake in the ‘fridge to harden, take it out and work on it for 5 minutes, repeat ad infinitum. It took a lot long longer than it should have, it became and stayed shiny, and I never did get it to look as professional as it should have looked. The weather is totally beyond my control. I have no idea what the weather is going to be when I agree to make a cake, so it’s a crap shoot. Nice clients understand this. Not-so-nice ones get their cakes from someone else. 🙂 My client, and his mother, was very happy with the cake, and in the end, that’s all that counts. That doesn’t mean I won’t harp on getting central air, but it does show you that sometimes all you can do is all you can do, and no amount of complaining is going to make it perfect or make it take less time.

Happy Dry Cool Weather Caking!