As promised, here’s the next tutorial, with one change: this baby’s so big we’ve split it into 2 parts. Part one now, part two later this week (hopefully).
On with the show! (Or tutorial, in this case.) Tute! Tute! (Yes, I know it’s toot, toot; but this is my abbreviation for tutorial. Cut me some creative license, will ya’?)
I was asked to make a cake for a local cake auction. They wanted a sax, natch- that’s what the band geek plays, after all. The guidelines were: sheet cake size, flavor doesn’t matter, and stay within the budget. I knew they knew what size a sheet cake really is, so I knew it had to be a mondo-big cake.
How to make one, though? I didn’t want a sheet cake with a picture of a sax on it. I used to chair this auction so I know this cake has to be spectacular. The point of the auction is to raise as much money as possible in a short amount of time and to try to get your donation noticed. It’s a friendly competition amongst the town folk and the students. Whose cake sold for the highest amount? What cake was the coolest one there? Knowing all this, I put on my detective hat and did some research. I put the chicklet on the detail work because when it comes to music and instruments, she’s just anal enough to make it “right.” No pressure, the band geek would know if anything is missing or out of place or whatever. We can do a replica in cake, right? Of course we can!
My research turned up this wonderful cake here: http://www.cakecentral.com/modules.php?name=gallery&file=displayimage&pid=1229817
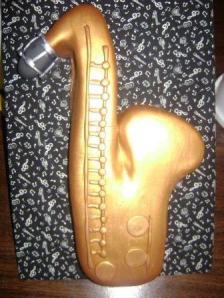
Debster's Awesome Sax
Look how shiny it is! I’m digging that ligature, too! Check out how the poster carried through the theme into the covering for the board. Most excellent job, doncha’ think? Man, I hope I can do this cake justice.
I saved that picture and imported it into Microsoft Publisher. From there, I made a poster that was three pages across and three pages down- for a total of 9 pages. Publisher has a nifty ruler on the screen, so I measured my cake pans and enlarged the photo to the size I needed. Once that was done, it was time to print that bad boy and see if it worked.
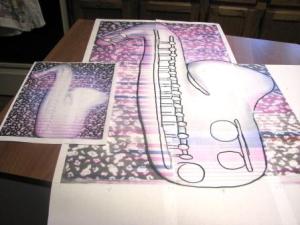
Yup! The size is correct, so get out the tape and let’s attach the pieces together.
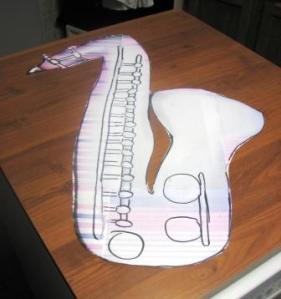
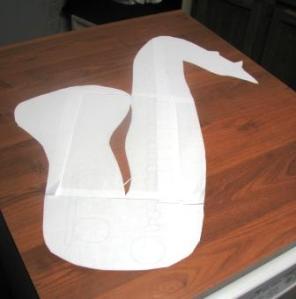
Now, time to cut it out. Hmm, I think I need darker lines. If you need that, too, take a marker and draw the outline before you start cutting. See? Better now, huh? Once you have the template cut out, check once more to ensure your cakes will be large enough ‘cause it would really stink to make the cakes and have to re-bake them or re-size the template. Hmm, let’s see. It doesn’t fit straight up and down. What happens if I move it like this? Yeppers, that’ll work! It fits if I lay the template at an angle. A little tougher to manipulate once it’s cut, but this will work.
Now, it’s baking time. Wow factor is great, but it has to taste good, too. I don’t want nasty rumors spread like, “Sure, she can decorate but have you tasted them?” I’m going to go wild here and make 2 flavors: White Almond Sour Cream (AKA WASC) and Chocolate Decadence. Get your pans sprayed and floured, get your ingredients out, and don’t forget the bake even strips and flower nails (from Wilton). What? You’ve never used them before? *Sigh* (just kidding)
Okay, a short tute within a tute for the uninitiated. Bake even strips help cakes bake evenly-just like the name says. Although my personal experience has been that they will dry out a smaller cake, they are almost a must for the big daddys. You’ll get less of a hump on your cake, too- which means less leveling. I’m all for that! The flower nails will draw heat to the center of the cake which will help the center bake faster and almost at the same pace as the edges of the cake. You prepare the nails like you do your pan- spray and flour them. Some people don’t do this step, but better safe than cursing, I always say. Place the nail pointed end up in your prepared pan. They should be evenly spaced near the center. Simple enough. Before you do that, I suggest you do the strips. Otherwise, the nails will flop over and you’ll have to do it again anyway.
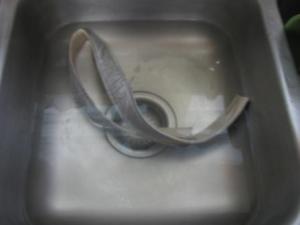
Strips
These eel looking things in my sink are the strips soaking. You have to wet them to get them to work properly. You’re going to pin these around the perimeter of your pan using these pins:

Pins
If your pins are new or you are better than me, they are all probably still straight. Hey, they work bent, too!
Once the strips are wet, pick them up and run your hand down the length of them while squeezing a little to remove the excess water. You want them wet- not dripping wet. I suggest you pin them around the pan before you put the batter in there. That way you won’t worry about spilling the batter as you’re pricking your fingers trying to get those blessed pins stuck into the strips.
Okay, are the strips on and the nails in place? Cool, now onto the batter! How much will you need? A lot! I used 2 cake extender WASC recipes per flavor. Especially since we’ll be carving this cake, you want it high enough to keep it from breaking on you. Here’s my ginormous bowl I used for the batter.
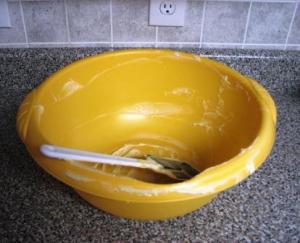
It was filled twice- once per flavor. Most of us don’t happen to have the industrial mixer handy (where would you store it even if you could afford it?). I have a “thing” about consistency so I made each mix separately in my mixer and then combined them in my big bowl. That’s per flavor. I made 2 batches of WASC, stirred them together in the bowl, and poured it into one pan. Then I repeated the process for the Chocolate Decadence and poured it into the other pan. Color varies from batch to batch- just like yarn, frosting, and paint. It may not be much variation, but for me it’s enough that I don’t want anyone to notice so I combine the batches for even color. When you’re pouring the batter into the pan, pour around the flower nails. If the nails flop over, don’t worry. Set them back up and go on from there. Some people don’t even put the nails in until after the batter is in the pan, so it’s honky dorey if you need to do that. Ok, you got all that? Let’s get these puppies into the oven!
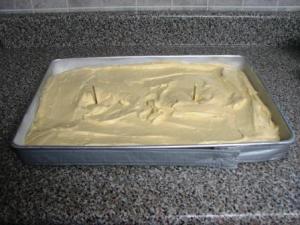
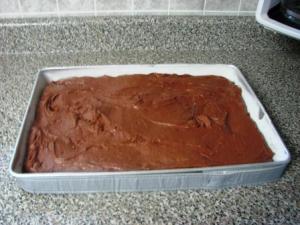
Okay, let’s speed this up a bit. We’ve got a long way to go and we’re just now getting the cakes into the oven. I started baking them at 325 degrees for 40 minutes. Then I added another 20 minutes and then another 10. Finally, they both tested done so out they come! Here they are fully baked in the pan. Can you see that they are high enough to be workable?
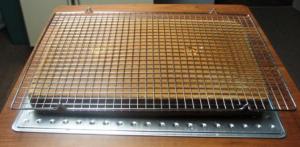
I used a large cooling rack and a large rimless baking sheet to flip them out of the pan. Whatever you do- make sure what you are using is big enough and strong enough to wrestle these suckers out of the pan without breaking them. No tears of frustration in the kitchen today! I can’t afford any more chocolate calories!
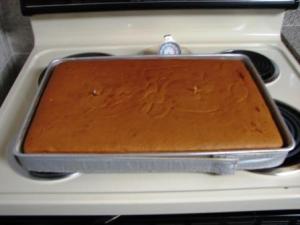
WASC Half-Sheet Baked
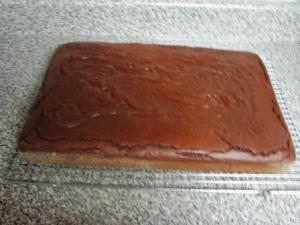
Chocolate Decadence Half-Sheet Baked
Level them, flip them, cool, them, get them wrapped and in the freezer. Yes, in the freezer. It’s my first time carving and I’ll be danged if I’m going to struggle with tons of crumbs and mistakes. Mamma don’t like patchwork.
While we’re waiting on the freezer to do its job, let’s sit down with a cuppa and chat about boards for a moment. These cakes don’t seem too heavy at the moment because they are separate. Once they are joined, they’re going to weigh more than that toddler that has glued itself to your hip. Cardboard ain’t gonna cut it here. Neither will foam board. Do you doubt me? Do you think I’m going overboard? Consider this: you have already spent a couple of hours doing this. You have many, many hours left to go. You want the end result to be spectacular, right? What you don’t want is to be on your knees scraping cake off the floor while that toddler dances around in the frosting “helping” you. Board this cake like you’re transporting the Pope on a dais! I used 2 foam boards plus a wood board that’s about ½” thick. All three layers were glued together with wood glue. The wood board was smaller than the foam board so I could slide it around and pick it up easier. Plus, I didn’t want the hassle of gluing a ribbon around anything to keep the wood from showing. So, man up, get thyself to the garage, steal a board, I mean borrow a board, and get gluing!
Alrighty, the cakes are as hard as Aunt Annie’s biscuits, so it’s time to move on.
Warning: scary stuff ahead! Not for the fearless, this carving thing!
I know I just lectured you about the board, but we’re not going to use those just yet. Unless you have time to carve, crumb coat, and final coat today, leave them on the cardboard for right now. If you have to put the cake in the fridge or the freezer again, I doubt it’s going to fit if it’s placed on what we’ll call “The Pope Board” -especially if your freezer door doesn’t open all the way since he-who-shall-remain-nameless placed it too close to the basement steps when you moved in 13 years ago and there it remained.
Place the cakes on the counter in the position you want them to be once the “two become one.” Position your template on the cake where it needs to be so it all fits on the cakes.
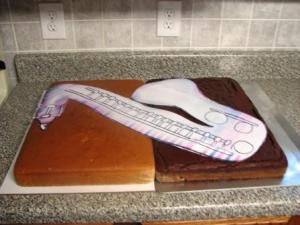
Now, let’s talk about knives. Think more “shive” rather than “serial killer machete.” While you do want a sharp knife, you only need a blade the depth of the cake. The big watermelon/bread cutting knife isn’t going to give you the control you need to go around curves, keep from cutting the board along with the cake, and if your upper cabinets are hung too low like mine, you won’t be able to cut straight up and down without a lot of banging and jerking.
Since this is some scary stuff, we’re going to start easy. Make sure your template is placed correctly and isn’t going to shift on you and then score around the template. We’re not going to dig (or stab as the case may be) right in and start hacking off cake. Ease into the carving to gain confidence and get used to the consistency of the frozen cake. It’s tough to see in the picture, but I outlined the cake first by cutting lightly into it.
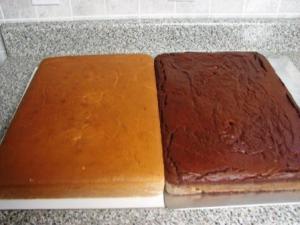 If you start carving right away, there’s no room for correction and back to patchwork you go. Ugh! Okay, round and round you go. Once it’s scored all the way around, lift part of the template and check that you can see the marks. Only lift part of it! If you have humongous sections that didn’t mark, and you take the whole thing off, you’ll have to be anal and line everything up again. No, you’re not a failure if you didn’t score deep enough. You’re just cautious and ensuring the wow-ness of the end product. So, lift and check, correct, lift and check, correct. All done? Good, now take off the entire template and check one last time.
Whew! Take a break, you deserve it! Besides, that toddler probably needs fed or removed from the toilet or something by now.
Are you back? Is the house still standing? Great! Shoo the kiddos outside ‘cause now you’re going to channel your inner Freddy Kreuger. The first cut is the scariest so take a moment to enjoy it and relax into the process.
I stuck the knife in all the way, and let it stand there for a moment so I could take a deep breath and tell myself, “that wasn’t so bad.” I’m a wuss that way. 🙂
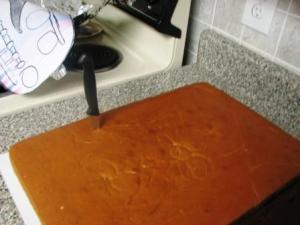
Move one of the cakes out of the way, but keep the template handy. You want your work area to be clear enough to turn the cake without knocking stuff off the counter. When you cut, think about carving a pumpkin: in and out and straight up and down. If you cut at an angle, you will have to cut it twice to get rid of that angle so: straight up, straight down. If the cake is thawed enough, you can even slowly slide the knife while following the pattern. Don’t take the curves like Earnhardt. Slow down and remember it’s better to drive the knife too wide rather than too tight. Too wide and you can go back and trim; too short and well, you’re out of luck. ‘Tis far, far better to cut twice than to change the final shape of the cake. Feel free to slice out to the edge a couple of time to get the excess cake out of the way. However, if your spatial thinking skills are a tad below par, like mine, I wouldn’t risk it. It wouldn’t be the first time I cut where I should not and end up having to fix a mistake. Once all the lines are cut all the way through, scooch over the excess cake and check it for fine tuning. Place the template back onto to the cake and check that you’ve made all the right cuts.
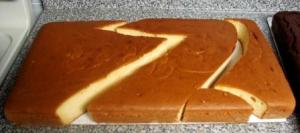
One cake done? You alright? Kids still alive? Move on to the next one and cut it the same way.
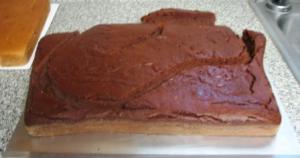
Whew!!!! Glad that’s done and over, aren’t ya’? Get both cakes back on the counter and place them together as they will sit for the finished cake. Look good? Do you need to fix anything? Place the template on once again and check, check, check. The separation between the flavors is a lil funky on mine, so I’ll take a picture to include with the delivery sheet. The end consumer will want to know where one flavor stops and the other starts, so take that picture now.
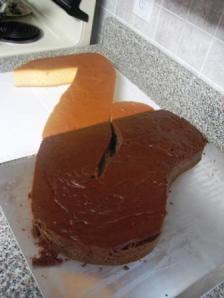
So, the carving is complete but you have lots o’ cake left. What to do, what to do?
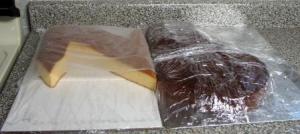
No need to sugar overload you or the fam with the cake scraps. Put them in Ziplocs and hide them in the freezer. On another day you can use them to make cake truffles or cake pops. There are a lot of scraps and there’s no point in wasting them. We’re in a recession after all. LOL
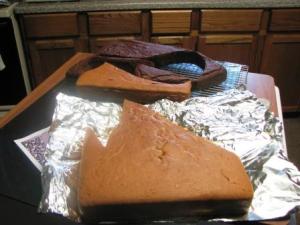
That’s enough for one day. The animals are probably getting hungry or getting into stuff. Wrap the cakes for freezing, put them in the freezer, find your counter top again, and order take out for dinner. You deserve it!
Part deux coming soon!
Tags: Bake Even Strips, band, band geek, birthday, cake, cake auction, Cake Board, cake pops, cake truffles, cake tutorial, cakes, carve, carved sax, carving, catering, chocolate, Cooling Rack, creating a template, flower nails, freezing cake, friends, how to carve a cake, instructions, Johnstown, music, ohio, Portfolio, Sax, Saxophone, shaped cake, sheet cake, template, tutorial, WASC, wedding, White Almond Sour Cream, Wilton


