Tag Archives: frosting

God Bless America and Give Me Some Cake

1 Jul

I’m alive! I’m alive! It’s a miracle! Err, okay, not a miracle. A miracle would be if something missed me by an eighth of an inch and I lived to tell about it. Or if people saw vining stuff growing up a telephone pole and didn’t think it was a sign from God. Anyhoo, nothing miraculous around here other than my bills are paid. Why I haven’t blogged in awhile is too boring a tale to tell and all that matters is that I’m here now, right?

Aww, don’t be mean. I mean well, I promise. I have good intentions. Almost always.

I have no segue so I’ll just start.

The good ol’ US of A is about to celebrate its independence from some nearsighted king the other way across the pond. I know this because I grocery shopped with the entire population of us’ns today. When do y’all go to work?

If you recall, a few years back, we did this crazy thing called Farmer’s Market. It was a lot of work and we lost a lot of money. During our insane period, I made two cakes that fit the bill for the 4th: a star cake and a flag cake. They’re fairly simple to do and they both could easily be translated into all buttercream if you like. I think someone needs to blog about buttercream cakes. Don’t you? I know I want to advance my skills and would love ideas that don’t involve fountains, stairs, or a star tip. I am going off topic, of course, but still….

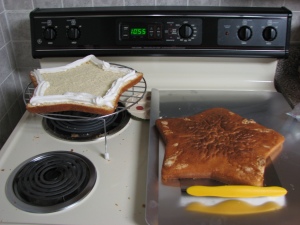
Ok, the star cake. Step one: bake a star shaped cake. Wilton has a pan for this. I think. I’ve got one. I don’t know if they still sell it or not. If they don’t, bake a square cake and cut triangles out of it to make it star shaped.

Torte and fill the cake.

Ice the cake.

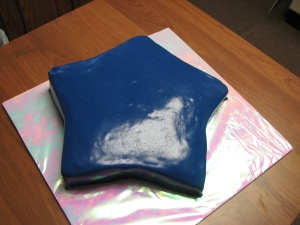
Smooth the icing and cover it in blue fondant.

Roll a rope of red fondant and place it around the bottom edge of the cake for a border.

Cut out a bunch of white fondant stars using a cookie, fondant, or electronic cutter.

Place stars randomly on cake.

Roll out two strips of white and one strip of red fondant. Roll this out on the thin side. Now place the red strip in between the white strips and roll over them to stick them to each other.

Alternatively, roll out one wide rectangle of white and one strip of red that is 1/3rd the width of the white. Very lightly moisten the back of the red strip and place it on the middle of the white strip. Look for moisture seeping out and dab it away as necessary. Roll over the whole shebang to adhere it.

The alternate way is easier, I suspect. I don’t know for sure because I did it the first way and it was not easy to get those strips to stay together. I think they were only children and therefore did not have experience being herded as a group.

Lay the strip decoratively across the cake and pinch it together in the two or three places you think would look best. Pinch the ends of the strip, too. Yes, that’s an awful description. I don’t know how to describe it any better than that. I do, however, have a final picture of it so you can see what I mean. A picture is worth a thousand words and all that.

Ta da! If I were to do this cake again, I would definitely roll the strips thinner and I would make the pinched parts look better. At the time, it was the best I could do. Now that I know better, I do better- thanks to Maya Angelou.

Oh, that other cake? Eh, next year. Maybe. Right now, I gotta go try to blow off my foot with a sparkler.

Happy Independence/Three Day Weekend America!

Sawing Logs

21 Apr

Oh, Wilton Bear Pan, how many ways to use you! There’s bears, lions, and uh…and uh…I know there’s a ton more. Beaver! That’s it! Beaver.

Ever notice how there’s not much beaver stuff around? Ever see a stuffed beaver in the toy aisle? A beaver chocolate mold? A beaver anything? The naughty girl industry has taken over the beaver and I say we take it back! Back, I tell you! No more shall we ashamed of the word in public! No more shall we hide our liking for such an industrious beast! Chant with me: Beaver! Beaver! BEAVER!

 Uh hum. Pardon me. Must have missed a dose of meds somewhere. Today’s post is about a furry mammal that builds dams, is the original “Baby Got Back” in the tail department, and has teeth the Osmonds envy. The Castor Canadensis also happens to be the mascot of a certain fraternity (you know who you are, I need not name names).

This beaver starts with the aforementioned Wilton Bear pan. I do not promise to show you miracles for arms, as I still do not possess such enlightening. However, I can show you some stellar tail.

The pan comes with instructions. Follow them. Mostly. Lose your instructions? Here ya go:

Click to access 2105-603Stand-UpCuddlyBear.pdf

While we’re clicking away, here’s a link that shows you some of the many uses for the bear that never poops in the woods:

http://www.wilton.com/shapedpan/Stand-Up-Cuddly-Bear-Pan

 Lose your clips? Wilton occasionally sells replacement here:

http://www.wilton.com/store/site/product.cfm?id=3E3107DF-475A-BAC0-517051D099ACA8A8&killnav=1

I read on the internet, back when it was the Internet, that you can use binder clips, too. Cause you know everything on the www is the gospel truth. The hubster and I conversed about such an option. After he informed me that there may be leftover oil on them from production and considering the possibilities of heating paint in the same small enclosed space as food, I decided against such folly.  So buy them when you see them.

Back to cake. The instructions will confuse, befuddle, and thrill you. Tis true, you bake him on his head. 

Tis also true you best set him on an old cookie sheet lest you like cleaning your oven.

Look, Ma! Beaver poop!

Ooooh, I don’t think he feels so good. Must have been on his head too long.

All better now? No kissing boo boos until you cool off!

Okay, enough goofiness. Someone remind me to take those meds tomorrow, k?

Take out the core, but don’t clean it just yet.

(I’ve never had one, but this is how I picture the aftermath of a colonoscopy.)

Here is the portion of the evening where I veer from the Wilton pros. I put the core back in and leave it there while it cools. Your choice, your comfort level. Other than that, follow the cooling instructions. First one side…

…then the other.


Now, let’s decorate! You will need brown/chocolate buttercream and some yellow and white (a small amounts). If you’re going to decorate the board, you’ll also need green. For the fondant, I used tiny amounts of black and white.

Crumbcoat your beast.

Doesn’t help with the defecation image, huh?

Using the grass tip (#233, found here: http://www.wilton.com/store/site/product.cfm?sku=402-233), convince the chicklet to pipe the bear. After all, you’ve got a tail to form. Remind her that his tummy and inner ears shall be yellow, or white, before you rush out of throwing range.

While she’s planning her reveng, get out the following schtuff:

Chocolate for melting

Wilton garland marker (http://www.wilton.com/store/site/product.cfm?id=3E30D6CC-475A-BAC0-58FEDC73887B09DD&killnav=1)

Tape

Wide straws

Wax paper

Table knife

Sharp knife

Ruler

This is the part where we really improvise. Put a piece of wax paper on your work surface. Assemble your garland marker to a size called, “looks right.” (Poinky part facing up) Put one straw on each end of the bendy part of the garland marker. Move the other end of the straws until they are touching or almost touching and tape them to the wax paper so they don’t move. Take another straw (or trim one of the other ones before taping. That’s what my cheap tail did.) and clip off a piece to the length of “that’ll work.” Place the short straw in between the other two. Confused yet? No worries, I took a picture. It should look like this:

Look like tail you’d chase yet?

Before you melt the chocolate, read how to make the tail so you can move as quickly as you need to before the chocolate sets up. Even though my sentence will say, “Melt the chocolate,” don’t do it yet; don’t believe me, I lie.

Melt the chocolate. Pour the chocolate into the mold to a depth you are comfortable with. Too thin and it may break. Too thick and you’ll be on a sugar high until your trainer uses lunges to cleanse it out of you.

Let the chocolate cool a bit, but NOT completely. Once it  firms up a bit (but not completely hard), use the ruler and the table knife to score it into a diamond/criss cross pattern. Do NOT cut all the way through or you’ll have to start over. I am not responsible for do-overs. Now, let the chocolate harden completely and remove the mold from around the tail. Use a sharp knife to carefully remove stray bits of chocolate.

Thank the chicklet for her services, promise her you’ll pay for her carpal tunnel surgery later in life, and carefully place the beaver on the board. Use a round tip and pipe the eyes. Using the black fondant, cut small circles and place them in the appropriate pupil place, AKA “about there.” Cut a small triangle and place it in the proboscis area. Cut two small rectangles of white fondant and put them in the chopper area.

Realize that you have 5 minutes before the beaver leaves to build a dam, smear green buttercream on the board and pipe extraordinarily long grass. Consider it the beaver stocking up on vegetation for the winter. Place tail on the board in the buttage area, wave bye-bye to it, and wish it luck on its two hour car trip. Don’t tell it a horde of college kids who are always hungry and love free food almost more than checks from parents await it, should it survive the trip under the watchful eye of Mattimeo, the chinchilla.


Good thing I didn’t name him.

Buh Bye, Beaver Boy!

Eat Your Heart Out

16 Jan

Whew! Everyone make it into 2011 okay? We didn’t leave anyone behind, did we? Woo-eee, what a ride! Have you been wondering where I am, if I’m okay, if I gave it all up to become Diddy’s personal assistant? Naw. I’ve been around. I’ve been hanging. With my peeps. Little peeps, big peeps, annoying peeps, and Little Bo Peeps. Or doing endless college assignments, picking up after those-who-are-old-enough-to-clean-up-after-themselves-dangit! and baking, baking, baking! Whatev.

I feel like I should have written posts for a year before publishing the first one. The thing is, you get them hot off the presses and right outta my kitchen. That makes it kinda tough to make a post about a holiday cake when the holiday has just passed. After all, I make my stuff as close to the day as possible. Which means, by the time the kiddos head back to the Ivy League, the holiday is but a distant memory except for the mess they left behind. Luckily for me, I have an ace up my sleeve. Okay, a heart, but still- I’m ready ahead of time for the next holiday.

This time, let’s do something for the less experienced among us. That right, rank amateurs, step on up! If your idea of making a birthday cake involves sticking candles in a cake covered with canned frosting and still in the pan you baked it in, holla! This one’s for you!

Swanky Heart Cake

I actually wrote this a few years back for a friend. I was just beginning my cake journey. Everybody say, “Awww!”

Okay, let’s get to it.

 Bake one 8 inch round cake AND one 8 inch square cake. Let cool for a bit and then remove from pans.

(Chocolate or Cherry Chip would go well.)

Make 2 batches buttercream pure white icing. Set aside approximately 1 ½ c. and tint it pink. The pink should be the consistency for piping. (This assumes your recipe takes 1 lb. of powdered sugar.)

Leave the remaining buttercream white at a consistency for frosting the cake with the exception of approximately 1 ½ c. for piping (make the 1 ½ c. the consistency for piping).

 Place the square cake on cake board, making sure one corner of the cake points to the bottom middle of the cake board and attaching with a dab of icing underneath to keep it in place.

Cut  the round cake exactly in half. 

Frost the cut edges of the round cake and 2 adjoining sides of the square cake. Place one cut side of round cake to one frosted edge of the square cake. Press together until it holds. Repeat with other half of round cake and other side of square cake.

So I’m not that great at fussing with shapes using a computer. *shrug* Close enough.

Using a heart shaped cardboard template covered in plastic wrap, place it in the center of the cake, making sure the point of the template matches the point of the heart cake. Go ahead and mark this space by white creating shells around it or just leave it in place to remind you not to frost there.

Crumb coat the rest of the cake white, let the icing crust and then smooth with your preferred method. If the round and square cake do not match exactly in size, fill it out with extra frosting to make it even and look almost seamless. The finish coat will finish the job of hiding the seams.

Finishing icing the cake with white, let crust, and smooth with your preferred method. You can use an icing comb on the sides of the cake at this time if you like. However, remember you must have a thick coat of icing to use the comb.

Thin a little of the pink frosting to spreading consistency and spread it in the middle-following the heart template. Smooth the pink as best you can. You do the pink last because it’s a little tough to cover pink with white, but not white with pink. Keep checking that it is lining up with the point and curves of the top edge of the cake- you don’t want an off-center heart in the middle.

Using a star tip (a bigger one works fine for the borders but use a little smaller one for the heart center) and white frosting, pipe shells to outline the top of the cake and the middle heart shape.

Again using a star tip, pipe the bottom border with shells and pink frosting.

Cut one Hershey bar into smallish chunks and place around bottom border and on top of center heart shape.

Fill in between the top white shell border and the inner shells outlining the center heart with cherry pie filling. Use a large eating spoon (AKA soup spoon) and be gentle so you don’t glop it where you don’t want it.

Melt another Hershey bar and put it in a squeeze bottle or disposable piping bag. Drizzle melted chocolate on the board in whatever way you like. Alternatively, you can do this with a spoon but your drizzles won’t be as small or as exact as you would like.

Finis! Cut, Enjoy, and Give away the leftovers!

Close but no Cigar

17 Nov

Consistency, consistency, consistency. Whether it’s buttercream, fondant, or the finished product, caking is all about consistency. Which I don’t have. And I’m pretty sure I may never have- but that could be the scale talking. Ask fellow cakers how they got so good and how they learned to turn out a consistent product and every one, and I mean every single one, will tell you, “Practice, practice, practice.” Ahhh, but my scale says I’ve practiced far too much. My doc will tell you the same, but his scale needs fixed ‘cause there’s no way I’m that much. No… flippin’… way.

So you tell these lovely cakers that you can’t hack more cake sitting around and they tell you, “Use dummies. Decorate on the side of a box or pan.” Okay, the dummy thing. I’m a dummy with dummies.

 (See this post: https://2chickscakesandcatering.wordpress.com/2009/10/03/fake-it-%e2%80%98til-you-make-it/)

 Aside from that, dummies don’t work for everything unless you want to spend a lot of money and be personally responsible for killing off the wildlife in a 1000 ft. radius of your nearest landfill because once you shape Styrofoam, there’s no putting it back to the original and you will never need that exact shape again.

 Then they tell you to give away your practice cakes. The problem with this is:

1. I don’t know that many people and even they’re sick of cake.

2. It is highly unlikely in this current society of weirdos and freaks that I’m going to walk into a nursing home, fire department, school, whatever, and give away cake. This little town thinks I am odd enough as it is; I don’t need a total shunning happening. “Here comes the crazy lady with more cake. Don’t make eye contact. Just walk away, quickly.”

3. It does not make sense to me to continually give free cake to the people who are your target market. Why would they buy when they can just wait and get free cake the next time I practice? I see lots of “I’ll buy the ingredients and you can get the practice” conversations in my future with this route.

4. It’s obvious I have no solid solution so let’s move on, shall weeee????

I tend to run across cake pans at thrift stores. Of course, I have to buy them. One of my finds is this pan:

http://www.cakesnkitchens.com/servlet/the-725/wilton-holiday-candlelit-3d/Detail

If you don’t have it already, you’ll have to get it used somewhere ‘cause this is older than my kids and my kids aren’t kids anymore, if ya know what I mean. I got this home and thought, “I bet this would make a good body” and felt another practice cake comin’ on. I was able to wait a few weeks, but sure enough, another cake was acomin’. Unfortunately, the execution was a tad problematic. I should have stopped after trying to get the black fondant to work for 2 hours. Yeah. Two hours. On the other hand, my bat wings are looking better.

At first, it was going to be a Bobcat mascot; but I’d already made a Rufus cake this Fall. I’ll show you that one another time. Never heard of him? Here ya go: http://www.ohioalumni.org/bobcats-mascots Instead, I had what I thought was wonderful idea, and it would have been, had I been able to get along with fondant that day.

The directions for this cake don’t say to fill the core tube thingy, but I did anyway. I dunno if Wilton learned later how handy a core of cake is and then the changed the instructions for the newer pans or what, but I filled mine. I used a cream cheese pound cake recipe so it would be sturdy, but having that core still seemed a wee bit necessary to me. Enough explanations, let’s get caking!

Using a paring knife, I trimmed off some of the bumps so it would be easier to frost smooth. I also whacked off the top so it would (hopefully) look like shoulders.

After that, I set it aside and started working on the head and limbs. I made a ball from crispy treats mixed with a little modeling chocolate (optional, but it worked really well to hold everything together tightly). I stuck a skewer in the head so I could install it and checked it for fit/size.

The arms/hands and the feet/legs were shaped from trial and error and previous experience with cakes. They looked rather penile but I kept on trucking and turned the radio on to get my mind out of the gutter.

 When the crispy treats were cool and solidified, I used a small grater to smooth the surfaces a bit more. I got that little tip from cakecentral and it worked fabulously! I’d give you the link but the site is still having issues so I seriously doubt I can find the thread again.

I stuck skewers in the arms before they were too solid to poke. I tried them on the cake for size. It turns out I am occasionally good size guesser, as these were perfect.

Yeah, I know. Penises on a stick. Think I could sell these at the fair? Hey, a gal’s gotta do what a gal’s gotta do, right? Uh hem. I better turn that radio up louder, huh?

Here they are, awaiting further construction:

I crumbcoated everything- no easy feat with the undersides of everything- let it crust, and then the final coat and smoothing.
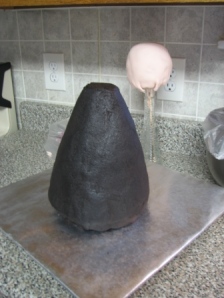
It’s time to drag out the fondant. As the above picture shows, I started with the head and that’s when it all started to go to heck in a fondant bucket. As you can see, I had a few problems covering the head smoothly. I used a new fondant recipe and it really really really didn’t work out. I’d tell you the recipe, or link to it, but I think it was possibly user error or a combination of user error and recipe poster error. Either way, the stuff would not stretch for God or country or nothin’. It would stretch a little if I heated it, but never ever ever did it stretch enough to make is usable for anything other than flat cut outs.  

I set aside the head thinking I would get back to it in a bit to fix it because maybe the fondant was tired and needed to rest a bit. One two hour black fondant kneading session later, and it was too stiff to fix it. I told myself to stop worrying about it right now and move on. THIS is where I go wrong with cakes; why I lack consistency in my work. I should have kept at that head until it was fixed. I didn’t want to get so frustrated that the rest of the cake would go to crap, too; so I took a deep breath, turned up the radio a little more, and moved on to the torso.

The black fondant is why we had leftovers for dinner that night. After two hours of kneading and tweaking the fondant, I gave up using it by itself. I added more water, more glycerin, more corn syrup, and more powdered sugar.  I melted marshmallows and added it in, I added marshmallow fluff, I tried corn starch and heating it up in the microwave.  I even walked away and let it rest for about 15 minutes, but no go. This stuff would shred when I tried to roll it out, no matter what I did to it. I finally sucked it up and mixed my remaining Fondarific in with it. So sad. No more Fondarific. 😦 That finally got it workable enough to use so I covered the torso and appendages with it and walked away for the evening, still hoping the cake fairies would arrive in the dark of night and fix the head. Failing that, surely the wrinkles would be hidden when the head was installed on the torso. Or the collar of the uniform would cover it, but something surely would save that head. Right?


Wrong. Very wrong. This far into it, the next morning I pushed on, telling myself it was a learning experience at this point and I didn’t ever have to show it to anyone if it sucked when I was finished. So, of course, I blog about it.

I used fondant from a previous batch made with a different recipe and extruded the hair, made the facial features, the uniform, and the cutest lil spats I ever did see.
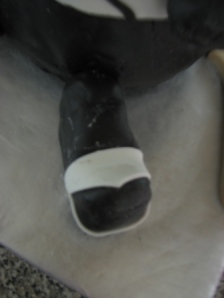
The close up shows the ongoing problem with the fondant. As it dried it started cracking. One of the arms eventually split and fell off. I suppose the crispy treats sucked the moisture out of it. Or the fondant just hates me. Whatever.

 I didn’t have the heart to finish the shoulder nests.

He developed an acne scar looking divot on his face. I have no idea why. Maybe prom was the next day or something.

In the end, Jack (for that was his name) never made a public appearance. There was no way that I could find to fix his flaws, which were numerous, glaring, and ugly. I tried sealing him a box, hoping the fondant would soften without air. After that, I put him the fridge for a few hours hoping that when I took him out, he would start to condense and that would soften the fondant. I guess that only happens when you don’t want it to, ‘cause it sure didn’t work for poor Jack. I gave up and didn’t even try to add more crispy treats to make his legs look more natural or add the white fondant for gloves on his hands. He looked so cute from far away, sitting there on the counter- like a real doll so both creepy and cute. However, up close, he looked like the cake failure he was.

Three days later, I ripped him apart, removed all the fondant, re-iced the torso, and sliced him up for the family’s snacking needs.

R.I.P., Jack.

So, whatcha,whatcha, whatcha want? Whatcha want?

16 Oct

Those words alone tell me the Beastie Boys either have family who decorates cakes, or have at one time themselves. The worst thing you can tell us decorators is “I don’t know” when it comes to what you want your cake to look like. Sometimes, I can pull it off, and other times, well, you’ll see…

First up, the dreaded camouflage graduation cake, with absolutely nothing to distinguish it as such. The grad wanted it camouflage with her school colors, I believe red and white (don’t flog me Fondant chick, I’m not familiar with your local school colors!), then with black as a third color and that’s all. So I ask, “what type of camo? The round blotchy type or the long streaky type?” “I don’t know, do what you want”. Sigh.

I decide to do the round/blotchy type, since I figure I can airbrush the camo. WRONG! Maybe it was having to deal with white as a primary color, but it started to go bad quickly (blow over and stencils sticking to the frosting), and I had no choice but to incorporate fondant for the black element. Thanks Fondant chick, it won’t be the first time you save the day! The grad was happy, but I was not. Lesson learned; there’s a fine line between camouflage and cow print, and fondant covers a multitude of sins.

Next, a birthday cake for a co-workers Mother-in-law’s 85th birthday. The actual ‘customer’ was the birthday girls’ son that lives in Texas, so it was my first long distance transaction! As we talked, we decided to go classic, some scroll work, etc… and I price the cake at $40 (16 inch round white 4 layer cake) and he said “Ohh this is gonna be fancy for $40. What kind of fruit filling will it have?” Sigh. I imagine this gentleman doesn’t spend much time perusing cake sites or local bakeries, but it also appears that he doesn’t watch a whole lot of cake shows either (bonus, no tv expectations!), so I reassure him that the birthday girl will be pleased, and ONLY because I have extra berry compote in the fridge that I really needed to find a reason to use before I found a reason to eat it, I didn’t haggle on the price. After talking with my co-worker (Texas’s sister-in-law) we went with a floral theme (she was leaning towards a basket weave design with frondant and frosting flowers, I was leaning towards not giving this cake away). In the end, Betty and the family were pleased and I received a lovely e-mail from the gentleman in Texas telling me to cash the check, the cake was delicious!  The next working day, I heard from several co-workers on how happy my co-workers’ family was with the cake (insert ego boost here). Unfortunately, this is the cake where I learned that my ‘cake ‘fridge’ was going on the fritz, and the frosting didn’t want to crust. Humidity? Who knows?

This next cake comes with a disclaimer. It was for my sons’ 8th birthday, and he has ADHD. Which means he changes his mind on what he wants for a birthday cake about every day or so for the 2 weeks leading up to the date. What started out as a ninja theme eventually turned into robots & army men. Sigh.

These last two cakes broke the trend of “I don’t know”.

A friend of mine celebrates ‘half’ birthdays. Her sons’ birthday is in February, we’re in Ohio, and that’s no fun, so he has a party in the summer, exactly 6 months out from his birth date. This year, he had pigs in the local county fair, and would be spending his half birthday in the stalls, caring for his pigs, so mama wanted a strawberry pig cake with a blue ribbon.

The other (snotty) boys who were there wanted to know why Ayden gets a half birthday party, and mama said “Oh, your mom doesn’t do this for you?” and turned on her spiked heals and walked away. Bonus, dad (ex-hubby) hates the concept of half birthdays, so I would have done this one for free.

Ok, cakers, here’s your challenge. Incorporate the following in a birthday cake. Music, religion, family and the birthday girls’ favorite foods; green beans, pie crust (not pie, just the crust) and breakfast cereal. G’head, I dare ya. And if you do, please submit a pic, we’d LOVE to see it!

A co-worker came to me with an order for her own birthday cake. You’d have to know Tonya to understand, and if I go into it, this post will turn into a 2-parter, I don’t know if I have the energy for it these days, and that in itself is another post. Back to the cake. She wanted a square cake with “Happy Birthday” on it, and in each corner of the cake, she wanted representations of the afore mentioned interests. She really wanted it to be ‘her’, and she was trusting me. Sigh. The only reason for the sigh here is that I know A LOT of people are going to see this cake or pictures of it for a long time, so it better be “Tonya”. Again, it’s the way Tonya is.

*quick background story. Tonya is African American, and you’ll hear her occasionally humming at work, but she’ll never belt out a tune for us, even though she makes recordings with her church choir. I’ve teased her for years that there are 2 things I’m jealous of  that black women do well, sing and wear hats. You can’t deny it. It’s just the way it is. Unless you are a member of the Royal Family or at the Kentucky Derby, white chicks can’t wear hats.  When I got married 9 years ago, Tonya brought her mother, in a stunning hat. Check out the representations of Tonya and her mama on the cake. Fondant chick to the rescue again!

*special thanks to all of my peeps who gave me suggestions for religious representations, I wouldn’t have come up with the crown of thorns without you!  And thanks for the reassurance that I wouldn’t burst into flames making a fondant Bible replica.

I’m still trying to use fondant, but as you can see, I use it sparingly. I don’t have the like for it that others do. As it stands, I’ll use it for accent pieces, but until I get off my hiney and slap some on the cakes dummies I have laying around, don’t look for full fondant cakes from me any time soon. My niece wanted me to teach her a few things about decorating cakes this summer, so I had her come over and we made a cake for her moms’ birthday. My sister-in-law has collected cow stuff for forever, so the obvious choice is a cow print cake. So, to give my niece some real hands-on work with this cake, I airbrushed the cow print and my niece broke out the fondant and made the letters for “Happy birthday”.  I was so happy with the airbrushing, that I broke out more fondant and wrapped the border of the cake board.   Well, my brother isn’t as slick as the average bear, and managed to blow the surprise cake delivery. In the end it was good, she loved the cake, and I learned yet another lesson; make sure all bits of fondant are off of your slice of cake. It’s like finding chewing gum in a piece of cake. Yuck.

So please, please know what you want your cake to look like.  An honest decorator will tell you what they absolutely know they can and cannot do for your cake.  Talk to them, exchange ideas and methods, and you and your decorator will not be dissappointed.  And give us more than a weeks’ notice, will ya?  Now, if you’ll excuse me, my lower back has a date with the heating pad…

This Just In

2 Aug

This week is gonna be bussssyyy. Groceries, periodontist, the Chicklet’s birthday, last week of class, and possibly Primitive Boy moving out of the manse. Y’all are lucky I’m here at all. LOL I’d like to find the highly degreed person who decides students should have one less day to complete the work plus an extra assignment that includes a long paper for the last week of class and have a “chat” with that person. Do they really think we worked on that paper all quarter as suggested? Yeah, right. Also, I would like that person to know that some of us notice things like the abstract is due before the final paper and the link you gave the students that explains an abstract says clearly that the abstract is written last. Cart before the horse or forcing students to turn in work before it’s officially due so the professor can knock off work a couple of days early? You decide. I’ll keep my opinion to myself until they slap that degree in my hand while I’m shaking hands with someone Important that I’ve never met while trying to smile and face a photographer who apparently is getting a shot up my gown from the looks of his position below. But I digress. Once again. I’m good at that, at least.

I blew off some things I didn’t want to do anyway and updated our PowerPoint portfolio. (Yes, it really is spelled that way.) We would LOVE it if you’d look at it and leave comments with your opinions. How is the layout? Colors? Organization? The fonts? (I kept them all in the Lucida family because Primitive Boy’s explanation about fonts and foots and all that stuff made my eyes cross. Never ask the opinion of someone who wears a t-shirt that says, “All I care about is ink, fonts, and crap like that.” Just shut up and kern for me, k?) I took out the character cakes and such even though they were all made as gifts. No sense in angering the mouse, eh? I think we’re far enough along in this adventure and therefore have enough cakes in the portfolio without them, anyway. We want to know it all- the good, the bad, the ugly, the few, the proud, the chosen…oops! Wrong blog for that.

Let us know what you think while I’m off pretending to be a grown up. Or working on my tan at the beach. Whichever.

 2Chicks Cake PowerPoint

Truffle Board

14 Jun

Whew! Modem problems, graduations, final exams, and cakes have kept me away far too long! Fear not. I have not forgotten nor forsaken you, my lovely cake friends. I have files upon files filled with scrumptious cake happenings to show you, starting with this:

For the two people who haven’t heard, one of the latest crazes in cakes is cake truffles. Please, call them truffles. They are time consuming to make and if we keep calling them cake balls no one is going to want to pay what they’re worth. Think marketing, k? Besides, some people are immature and snicker when you say, “balls.” 

Cake truffles are a great way to use leftover cake, but they can also be made with an entire cake. You will, however, have to invest mondo amounts of time to do an entire cake. Just sayin’. Plan accordingly. Basically, you smoosh the cake into crumbs, add icing, roll into ball shapes, and dip the truffles in chocolate. You can use any combination of flavors that strikes your fancy. You can add flavored oils to them if you like. You can use up leftover frosting. You can magically use vanilla cake and turn it into chocolate cake just by using chocolate frosting. They can be frozen. Watch out for bloom, though. If they bloom, thaw them until they are dry and sift either confectioner’s sugar for white chocolate or cocoa for regular chocolate over them to cover up the white spots. The spots aren’t harmful, just fugly.  I actually prefer them frozen. I should warn you: they are addictive. These are not “I need to fit into a smaller size” treats.

I’ve figured out all sorts of things along the way, but there was one issue left and I think I may have solved it. How does one set them down after dipping? I’m jumping ahead, though. Let’s start at the beginning.

The cake needs to be broken up into small pieces. It should be bigger than grains of sand, but smaller than chunks. Chunks will make it difficult to roll a smooth truffle. The easiest way I’ve found to do this is in my food processor.

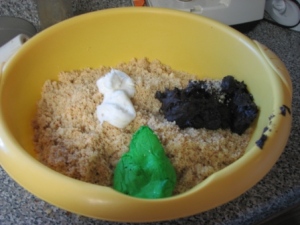
Now add the buttercream. Some people use canned frosting, but the best flavor is with homemade, in my opinion. Here, I’m using bits of leftover frosting from other projects.

See the dark chocolate frosting? That’s what is going to turn this vanilla into chocolate.

The amount of frosting to use varies from cake to cake. Start small and add more as needed. Don’t go by the amount shown above as the bowl is potato salad for a family reunion huge. Start with one of the dollops shown and go from there. Test it by rolling it into a ball shape. You want it to firmly hold together without cracking.

(I added cocoa to this batch to make it more chocolately and to correct adding too much frosting.)

It will probably stick to your hands a bit once you’ve rolled 3 or 4 of them.

(Shoes are for sissies or paid orders, LOL)

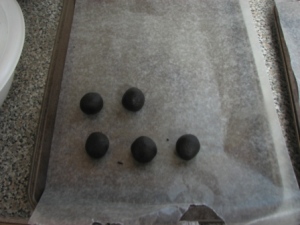
Once you’ve reached the correct consistency, roll all of the truffles and as you roll them place them on a waxed paper lined cookie sheet.

When the sheet is full (or you run out of mix, whatever happens first), put them in the freezer. At this point you can freeze them until they are solid, toss them in a Ziploc type bag, put the bag in the freezer, and stop here until you are ready to dip them. This is handy if you don’t want to risk chocolate bloom but don’t have time to do it all right now.

Once you’re ready to dip, have the paper lined cookie sheets handy. I like to start with an empty one so I’m not maneuvering around the undipped ones. However, with my latest method, this isn’t a problem.

The type of chocolate you choose is personal preference. You can use chocolate chips, candy melts, leftover Easter bunnies, or go high class and use couverture (that’s so fancy I don’t know how to spell it). Let your budget and personal preference guide the way. The important thing here is that the chocolate must be tempered. It what you use isn’t already tempered, you’ll have to learn how to do that first. A topic for another day and for someone much more experienced than me.

Note: Chocolate and moisture do not mix. It will make the chocolate seize. You will know it has seized because it won’t be all melty and smooth anymore. You can try to rescue seized chocolate by stirring in shortening a teaspoon or so at a time until it returns to the correct consistency.

Now that you know that, chop the chocolate.

Hang in there, we’re almost done. It’s time to melt the chocolate. There are three methods to accomplish this:

Double boiler (see above pic)

Microwave (which is difficult for me to achieve the perfect temp: melted but not burned)

Crock pot type melting device (see below pic)

(The pictures I’m using are a combination of batches. The ones shown above are coconut flavored cake truffles.)

Get the truffles from the freezer while you are melting the chocolate. If you dip them when they are too cold, the chocolate will crack so you want them solid enough to hold together while dipping, but not too solid or you’ll have to dip twice to cover cracks. Dip to your heart’s content, let the chocolate set up, and they’re finished.

This brings me to my dipping experiment. As I said, I don’t have a lot of luck moving the truffle from the chocolate dipping area to the cookie sheet. I have tried all sorts of devices: toothpick, fork, spoon, and several special instruments made for chocolate dipping. None of them work to my satisfaction.  Tapping the instrument against the side of the pan helps the excess drip off but you can’t do that with a toothpick. If you don’t use a toothpick, you have to cover them completely with chocolate, which means there’s no uncovered “blow hole” to prevent blow outs. It’s a dilemma.

Instead of using cookie sheets to place them on to harden, get out your cooling racks and cover them with waxed paper. This method uses more toothpicks, but sometimes sacrifices must be made. Using one of the toothpicks, poke holes into the waxed paper.

Hopefully you can see the spaced holes in the picture. Dip the truffle into the chocolate, covering almost completely. Remember: you want a small spot left uncovered. The sensible place for this is near the toothpick which you stick into the middle of the bottom of the truffle so it won’t be seen unless someone has an uncontrollable urge to look at truffle butts or something.

(The uncovered area should be a lot smaller than shown above. This picture also shows the difficulty in dipping when the chocolate level gets low.)

Now that the truffle is dipped, you are going to put the toothpick (still stuck in the truffle) into one of the holes in the waxed paper. It’s easier to start in the center of the rack and work your way outwards.  One hand holds the toothpick from above while the other waits underneath the rack to receive the toothpick. Move slower than you think so it’s doesn’t drop from one hand to the other.


Place the toothpick into the hole, pause, put your other hand underneath and grasp the part of the toothpick sticking through the hole. Remove the hand that’s above the rack, and with the hand that’s grasping the toothpick below the rack, lower the truffle until it is sitting on the waxed paper. Let go of the toothpick and slowly remove your hand from beneath the rack.

Ta da!

Your truffle is now sitting on the rack and it hasn’t rolled anywhere, you didn’t scrape off chocolate getting it from the toothpick to the rack, and your fingers aren’t chocolate covered in the process.

You can dip about 6 truffles and then the chocolate is set enough on the finished truffles to enable easy removal of the toothpicks so you can reuse them for the rest of the truffle dipping.

Other than using more toothpicks, the only problem I have with this method is removing the chocolate that pools at the bottom of the truffle. When using the cookie sheet method, you can score around the bottom of the truffle before the chocolate is completely set. You can’t do that with this method. However, I always had to fine tune them with the other method, so it’s no biggie for me.

Once the chocolate is completely set and all the toothpicks are removed (you can place the racks in the fridge or freezer to hurry this process), use a cookie sheet (rimless is best) and slowly pull the waxed paper off the rack onto the cookie sheet. Most of your truffles should stay stuck to the waxed paper. If not, as long as the chocolate is firmly set, it’s not a problem. Now that they are on a solid surface, you can trim the pooled chocolate with the knife of your choice.

Eat. Enjoy. Place in mini cupcake wrappers and impress your friends with their elegance.

Just don’t try this unless it’s Halloween because people freak out far too easy and won’t eat them.


Ker-shoe! Excuse me while I make amends.

3 May

Shoe cakes are still enjoying some popularity and I am not immune. Since I still can’t walk in heels; in fact, every time I tried to wear them to school it was guaranteed that I would fall in the halls (and I had an awesome knack for somehow knowing just when they would be freshly waxed).  I naturally lean more towards Converse and less towards, as Carrie says, “the big girl shoes.” I also had to make up for this monstrosity:


It seems like a dream. You see, I once worked for “the man.” Forty hours every week. Plus college, plus marching band season, plus, plus, plus. I was a tad worn, a tad frustrated, a tad oppressed, a tad plum crazy. Yeah. That tends to show up in cake form when you have a few hours to get it done so you can go to bed and get those golden 5 hours of sleep before those-who-sign-your-check insist you be upright and at your desk again.

I wouldn’t call this cake a disaster. It’s all in one piece. The buttercream and fondant are smooth. The colors are pleasing. It’s just missing something. Stuff. It looks plain, like a grocery store cake. I suppose the purchased dude doesn’t help with that, either. Eh, looking back, it’s an okay cake; but who wants to make okay? I want spectacular, wow!, cool, awesome, how’d ya do that? kind of work coming from my cakeworld. I couldn’t do that right away (see above crazy life), but I determined I would fix this, someday. A shoe cake fit the bill, talked the talk, and walked the walk.

With such popularity, you think there would be a template online for this. Nope. Maybe there is now, but I sure couldn’t find one when I needed it. I’m lucky that way.  Left to my own devices/talent/imagination, I pondered my feet for a moment and realized my feet were still big. Not gigantic-special-order-shoes big, but there are no tiny dainties dangling from my spider veined ankles, either.  My feet, dear readers, are the perfect cake size. At long last, a reason for my suffering! All those years of my parents threatening to just strap boxes to feet have finally paid off!

Hmm, problem. Shoes are dirty. Shoes are smelly. Shoes are not food safe. Well, maybe if you’re an ogre or a goat or something; but otherwise it’s best to keep de feet away from the mouth whether you’re eating or conversating. With this dilemma began many tracings, swappings, and clean paperings to keep anything shoe or foot related away from the cake. I feel it’s important for you to know that ‘cause that’s how rumors start. You know who you are. Silly gossips, rumors are for turds.

As my biz math teacher says, with a hop no less, “Okay, here we go.”

The Tracing of the Shoe:

I wanted to have enough cake to carve away so I drew what would be called a seam allowance if we were sewing.

Notes on template: Carve under toe area, Carve under arch

At least, I think that’s what that says.

To help carve the sides, I made one more template:

Note that once again, I added a seam allowance.

I also took pictures of every side of the shoe for reference.

Don’t set the scraps aside yet. You still need an upper. One upper, coming upper!

Now that we have the basic shape, it’s time to fine tune it. The tongue area needs to be slanted more and we have to create a place to put a foot in- if we were going to put a foot in, which we’re not; but it’s supposed to look like you could. It’s all part of the illusion, folks.

“Gluing” more on to help create the slant:

I remembered to carve under the toe, but I decided against carving the arch. I didn’t want fallen arches and I was fairly sure that’s what would happen if I carved there and didn’t replace it with support. If I have to replace what I took away, why not leave it there and save myself some hassle?

I used a cookie cutter for the foot hole? Is that’s what it’s called? I doubt it, but today let’s pretend that’s its name, k? The depth of the hole may need some tweaking as you progress. Too shallow and it looks stupid. Too deep and you risk the outer sides falling apart. Start shallow and work your way deeper as needed, just like a blind date.

Once the cake is carved as close to your satisfaction as it’s going to get, crumb coat and decorate.

Looks like a clog so far. Fear not, cake friends! Have faith in the power of the caker!

Sing along with me: A fondanting we will go, a fondanting we will go….

Bubble, bubble, toil and trouble! I’ll smooth you, my pretty! Just you wait and see!

The tongue is quite a bit thicker on one end. Go ahead, check out your own ‘chews.

Don’t forget to narrow the end of the lace by rolling it between your fingers.


(cut two of the above shape)

I used a pastry wheel to quilt lines all along the cake, but I didn’t take pictures of that. I think you’ve seen enough of my man hands for awhile.

For a faux glimpse of the insole:

That’s your basic plain shoe. The rest of the décor is up to your crafty imagination. I added side stripes/arches and a bald dude. A cute bald dude, but bald nonetheless.

Yeah, I could not have done this in the three hours at night I had after working that “real” job.

Real jobs are overrated.

 I say marry middle-class and coast, baby!

Walking a Mile in Bad Cake Shoes

20 Apr

Written January 20th:

Not every cake can turn out to be a spectacular creation. Murphy’s Law is bound to visit the kitchen at least occasionally, right? If, by Murphy’s Law, you mean exhausted, frustrated, overwhelmed, and brain dead; then, yeah. It happens. When time allows, we can laugh it off and start anew; but what do you do when time does not allow? You do your best and hand the cake over, hoping that it’s not as bad as you think. After all, by the time we’re done with a cake we’re sick of it. We see every little flaw- every slightly crooked line and every hump that shouldn’t so very few cakes leave this kitchen that we feel are perfect. It’s the nature of the human/cake beast. However, what do you do when, as much as you tried, it really isn’t right?

The basic design was good. The details were not. It simply did not look the way my brain pictured it and I had no idea how to fix it. I brought in the chicklet and she didn’t know, either. She said the whole thing wasn’t right. I said, “This is the approved design. I have to follow the approved design.” She said she didn’t like it and left me to my misery. I asked the head dude around here for his opinion. “It needs something else. This part isn’t right.” Okay, what should I do to fix it? “I don’t know. It’s not right. You need to do something entirely different.” Crud. I can’t. It’s 10 at night, I’m exhausted, I’m supposed to be in bed in half an hour and I haven’t even showered yet. There’s no time for “different” even if I could get the change in design approved at this late hour. The only thing to do is go to bed and hope it miraculously fixes itself overnight. Yeah, right.

The original drawing:


The only thing not pictured was a guy walking and the actual colors chosen. The birthday dude racewalked, thus the guy walking. To keep costs down (fondant figures involve a lot of labor cost), I purchased a figure that I hoped I could make look like he was walking. In my defense, the packaging prevented me from touching the actual figure. If I had touched it, I would have known it wouldn’t work. I thought he was wax, but he was plastic. Shoot! You can’t really alter plastic too much. I put gray fondant around one foot and decided he was resting that leg on rocks. That’s as close as I could get.

No one thought it was enough. No me, not the chicklet, not the head dude, and not the client. Not only that, the track didn’t look right and I wasn’t happy with the medallion (too one dimensional for me).

See? It doesn’t look like a track. Looking back, I should have narrowed the lanes, added a third lane, and outlined them-plus put in the starting blocks. The medallion should have been thicker and had a raised edge. I should have figured out how to make the ribbon flow instead of laying flat. See the fondant rocks? There’s a soccer ball underneath. Had I not been afraid I would break the plastic, I would have cut off the soccer ball and left his foot hanging in air- as if he was walking. Small catch, though. Not only is he plastic, he’s hollow plastic. I thought he was solid wax. With solid wax, I could have whacked off the ball and adhered a fondant sole to the bottom of the foot. How I would have explained him slapping his knee, I dunno. So, it still wouldn’t have been perfect, but at least it would have been within the realm of acceptability. But it wasn’t. And I was exhausted. And frustrated. And brain dead. And regretful.  Very regretful.

This cake is one of the reasons I did something I’ve never done before. I quit a job. Not “turn in two week’s notice” quit; “walk in on a Monday morning, pack up your desk, and leave” quit. I was nearly to the point of breaking down completely. It was time to go. Now. Not in two weeks. I was behind on everything that really mattered to me. I wasn’t doing things to help my family other than earning money. Christmas preparations would not be finished.  I was submitting less than stellar work for my college class. I had hardly seen the chicket or junior dude during their free time. The head dude was working by my side as hard as I was and the chicklet was pitching in when asked. It wasn’t enough. We still needed another person to do what we couldn’t. Even if that person had poofed into our lives, we were all still exhausted and brain dead. It sure didn’t help that work sucked. Yeah, sucked. I won’t go into details, but it was bad for my psyche. It was all   simply    too    much. And now I couldn’t even cake any more.

Achieving 80 years is a feat. It deserves a “WOW!” cake and I was entrusted with making that happen. I didn’t. There no “do over” on this. There’s nothing to do but try to clean up the wreckage.  I quit the job and went home to bake, shop, wrap, and clean like my butt was on fire to get ready for Christmas. Once that was accomplished, I decided to create my own “do over.” Nope, not fooling myself. It wasn’t going to make rainbows shine over the land once again, but perhaps it would give me a chance to show how truly sorry I am that the confection I provided wasn’t what was needed. I needed to apologize with more than just words. I did what I did was because I am really sorry to have given bad cake. Not cool.

Cake Redux:

THIS is what I should have done (and placed it on top of the first cake to reach the required number of servings). THIS is a celebration of reaching 80 years and dang! walking more than any of us walk at middle age, much less at 80. My sincerest apologies to Jack, to his family, and to his friends. I hope you get together with them soon and eat cake. Good cake this time.

Now, if you’ll excuse me, I need to go make an apology pie for she-who-put-her-work-rep-on-the-line-and-let-me-use-her-as-a-reference.

Today:

Wow! I can’t believe I wrote this way back in January and never posted it. I forgot so completely that I started writing another post about it because I couldn’t find where I had posted it, so surely I must never have written any of this. I forgot how bad it all was, the craziness that was my life a few short months ago, how much I hated that cake, and how bad I felt for letting down the people in my life.

Now that life is nearly completely hunky-dory again, I think it’s high time I posted how I actually made the “I’m so sorry my life screwed up your life” cake.

Stay Tuned for “Taming of the Wild Shoe” or “Ker-shoe!” I haven’t decided on the name yet. Discuss.

Show some cake love…..

7 Apr

http://www.thecakegirls.com/

Trust me, if you have watched any number of cake challenges on Food Network, you’ve seen Mary’s work.  Such a tragic event to happen to them, and right as wedding season approaches.  I can appreciate the hard work that went into building their bakery, and the heartache must be devastating.  So help a cake sista out, wontcha?  Buy a shirt, slip ’em $10, whatever you can do.  Let’s help them help their employees until they can get back on their feet.