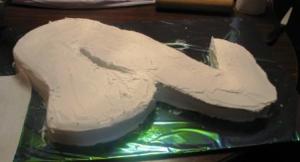
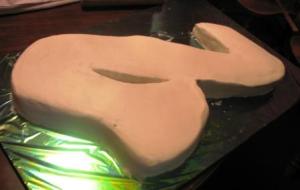
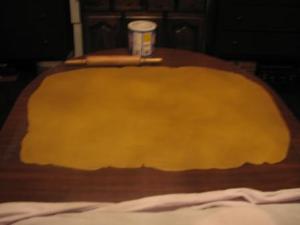
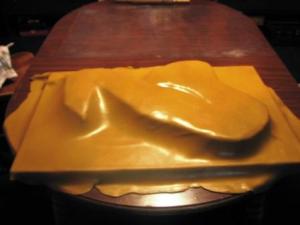
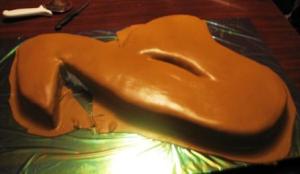
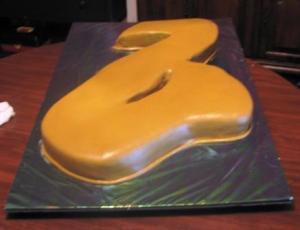
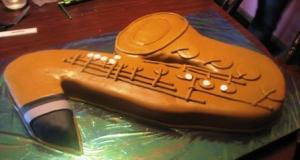
We left off with the carving finished (Yay!) and putting the cake in the freezer. Remove your cake from the freezer and let it thaw while still wrapped. Leaving it wrapped is important! The moisture that was in the cake is probably on the outside of the cake and thawing it while wrapped will allow that moisture to seep back into the cake. While it’s thawing, have some breakfast, read the paper, and toss back a cuppa before the kiddos are up and underfoot. After that, let’s start making the fondant.
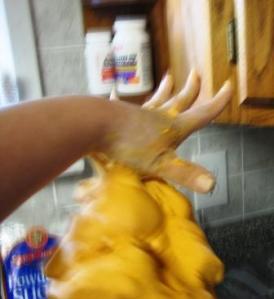
Personally, I use Marshmallow Fondant. It tastes good, it’s cheap to make, and it’s more likely to be eaten than some commercial fondants. Once again, color consistency is important. The sax will need 2 large batches of fondant. Make both batches separately for ease of mixing, and then knead them together until it’s all one color. If you have trouble knowing when to stop kneading in powdered sugar, check out this action shot:
Yup! I took that picture while dropping the fondant. Mad camera skills, eh? The fondant should stick to your hand and begin to stretch before releasing in its entirety (assuming, like me, that you haven’t washed your hands between the kneading and the testing). At this point, it’s still pliable but it is stiff enough to roll. All you need to do at this point is put shortening on your board and rolling pin and it should be perfecto. Mwah! (I’m making hand kissing gestures over here. Somebody stop me before I get too crazy!)
One of the more difficult parts (besides carving) is getting the color correct. Before we tackle that, set aside a golf ball sized peice of fondant (or a little bigger) while it’s still white. Wrap it well. White tends to dry out fast. Alright, back to coloring. Trying to achieve a perfect, clear gold is an exercise in insanity. For those of us who are unfamiliar with brass instruments, they age in many shades. Perfect gold only happens on brand new instruments and even then the exact shade will vary from instrument to instrument. So, relax a little, and let’s play with color!
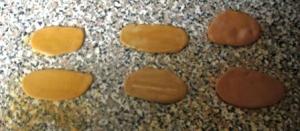
Before you we have three samples of fondant. Each is a slightly different shade. I’ve arranged them from light to dark. For this experiment, you’re going to need a small cup, a food safe brush, gold pearl dust, and vodka- or clear vanilla. Your choice- depending on your preference and time of day. Using the brush, apply the dust dry to one of each color. When that’s complete, put a teaspoon of liquid in the cup and sprinkle in some dust. Stir the mixture a bit and apply it each of the remaining pieces of fondant. If you haven’t used vodka, you can call the kiddos into the kitchen and play, “Goldie Locks and the Three Bears Guessing Game.” Which one is too light? Too dark? Just right (or close enough to just right)? Whichever one you like best, that’s the color and dusting method to use. Adjust the color of the wompa ball of fondant as needed, wrap it in plastic, and let’s get back to cake!
Your cakes should be just about ready to frost by now, so go ahead and make all the buttercream you’ll need. How much will you need? If I remember correctly, using your own personal fave recipe, make enough that it uses about 4 cups of powdered sugar. If you’re concerned about the color showing through under the fondant, color it the same color as the fondant. I got uppity and went with white.
Cover your buttercream to keep it from crusting over, and go in search of the board I told you to make yesterday. This may take awhile if the kids decided it would make an awesome sled or the original owner of the wood board repossessed it.
Once you locate the board, cover it with the food safe wrapping of your choice. Yes, you must cover it. If not, the board will detract from the soon-to-be awesomeness of the cake. All wrapped? Cool. Let’s move on before we realize it’s about to get scary again. Smear some dabs of buttercream on the now covered board where the cake will sit. Make sure the dabs will be covered by the cake or we’ll have to do it again after we clean up that oopsie. Place half of the cake on the board and frost the end where it will join with the other cake. Slop plenty on there. It’s okay if it oozes out a bit when it’s joined. Better too much than not enough. We don’t want this bad boy to separate and muck up the whole shebang. Next, place the second half on the board as close as you can get it next to the first cake. Gently slide it into place and then press both halves gently but firmly together. Use the buttercream to fill in any gaps around the edges. Now, step back and take a look at the cake. Are they joined correctly (or at least close enough you can fudge it with buttercream? It is? Good. You’re now ready to crumb coat the cake. Go ahead; I’ll wait. I’ve got nothing better to do right now anyway. At least, nothing better I want to do right now.
Once the crumb coat is crusted a bit, smooth it some more, and then put on your final coat. You know the drill: let it crust and smooth the final coat. Make this last coat as smooth as you can get it. Any major humps or bumps will show through the fondant. Cover the cake so the buttercream doesn’t crust so much that the fondant won’t stick to it.
This is where you’re going to need major space. I used my dining room table that seats 6 comfortably or 8 if you’re friendly. Place the cake and board on one half of the table. Put whatever you use to roll fondant on the table, smear shortening on it, and smear shortening on your hands and rolling pin. Give a heavy sigh, thinking of the work ahead, and start rolling your gold fondant out. At this point, it’s handy to remember how large the cake is, so feel free to measure it before you start. Roll, roll, roll, shake out your arms, and roll, roll, roll again. The fondant needs to be the same thickness through-out. When in doubt, roll it larger than you think you’ll need (if you have enough fondant). ‘Tis better to roll it too big and roll it once than to roll it too small and have to *&%#$@*ing roll it twice. Oops! Did I just say that? Moving on…
Here’s a tiny tip for you: set aside a strip of fondant long enough to place in the center of the cake. See the hole in the middle? Yeah. That’s an impossible task to cover once the big piece of fondant is placed. How do I know? Don’t ask, baby. Don’t ask. Listen to the voice of experience here- you want to put that strip of fondant in place before you put the biggest piece of fondant you’ve ever rolled in your life on top of the cake.
Is the strip in place? Is the rest of the fondant ready?
Here Comes the Scary Part! Cover Your Eyes, Kids!
Pick up the fondant and gently place it on the cake. Before it touches even one itsy-bitsy teeny-weeny part of the cake, check to ensure it’s lined up the way you want. Removing fondant is a huge pain, and sometimes impossible, once it touches the cake. I rolled my fondant on a big piece of plastic, so picking it up wasn’t so hard. Okay, I had help. I enlisted Big Daddy to help me move it. The fondant should be stuck enough to the plastic to stay on while you turn it over but not so much that you can’t gently peel back the plastic to remove it once it’s lying on the cake. Obviously, it was “all hands on deck” for this part, so no pictures could be taken of the process. Using whatever method works best for you, center the fondant where you need it and place it on the cake.
There’s no time for a sigh of relief, you have to adhere the fondant to the cake before the weight pulls it down and tears it. Move, move, move! Okay, not that fast. You’ll mess it up if you try to move too fast. From here, it’s like every other fondant covering job you’ve ever done. Adhere the fondant to the top of the sides first, then the top, then the corners (or the curves in this case). Whew! The tricky part is over.
Now breathe a sigh of relief and plop down in a chair to work on the sides and such. There’s no getting around it. You’ll have to cut a slit in the middle of cake so you can push the fondant into the hole. If it’s your lucky day, and the fondant is stretchy enough, it will easily mold to the hole from top to bottom. If not, at least you put that strip of fondant in there first. Rare is the person who will peer far enough down into the hole to see the seam between the pieces. If someone does, snort with derision, turn your back on them, and walk away. They deserve it.
Once the whole hole issue is taken care of, move on to the sides. Trim away part (not all) of the excess fondant. Once you get the hang of making fondant the right consistency and smoothing it onto a cake, it’s not that hard. Trust me. “Get it” once and you’re pretty much set for life. Right now, it probably has what looks like a thousand pleats on the sides, doesn’t it? We’re gonna fix that right now. Getting the sides smooth is simply a matter of lightly (and I mean lightly) stretching the fondant and pulling it away from the sides. Starting with the curves, pull, stretch, and smooth; pull, stretch and smooth. It’s okay to adhere the excess fondant to the board a little to keep it in place once you have a section smoothed. If too much fondant is getting in your way, trim a little of the excess off. Not all of it and make sure it really is excess first, but go ahead and trim to make life easier. When the curves are done, the sides may looks worse. S’alright. Use the same process of lightly pulling and stretching to get it smooth. If you can’t get it all smooth, try to get the bumpy part down to the board. We’ll put a border on the cake later that will cover it. In extreme cases, you can even cut out a pleat; but I really dislike doing that. If you have to cut out a pleat, join the two sides by gently stretching them. Grease up a couple of fingers until nice and slippery and start rubbing the seam. It takes a little while and it may never go away completely but you should be able to make it only a tad noticeable. Try really hard to not have to cut it, though.
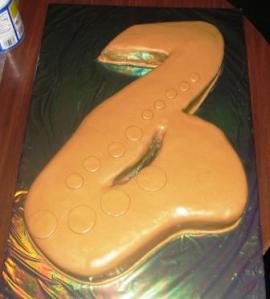
What feels like forever later: How does it look? Are you ready for the final trim? Trim away! After the remaining excess is removed, use a lightly greased hand and rub it over the fondant one last time to ensure it’s all adhered to the cake. Ta-da! It’s all piece work from here on out! You’ll notice in the picture that I put the border on. Ignore that. I had to take it off a few times to put on some details; but you’re going to be smarter than that.
They say the devil is in the details. Let’s find out if it’s true. So far, it looks like a *Yawwwwnnn* sax. You can tell what it is, but it hasn’t reached, “Dahling, it’s gorgeous!” yet. Back to work, then. Root out your circle cutters and your clay gun (if you have one). Tell the chicklet to get her hiney in here ‘cause she’s on deck? What, no chicklet? You really need to put that on the grocery list. I don’t know what I’m going to do when mine goes back to college and leaves us to do all the work- especially musical detail work. *Sigh* I guess we’ll have to cope somehow.
It might be helpful if you can find a detailed drawing of a saxophone. For a cake this size, you’ll need tenor sax info. Yep, it’s true to life in that it’s the same size as real tenor sax. How’s that for authenticity? I would give you a link, but I have no idea where the chicklet got the one she used. I’d ask her but the communication lines are down at the moment. She’s hours away teaching a whole new generation to stop playing to the ants and get those ‘bones up. I tried finding it on my own but no such luck today. Perhaps there’s some secret website only band geeks can find? If you find one, leave the link in the comments section so everyone isn’t left to suffer and guess, will you? C’mon! Be a pal!
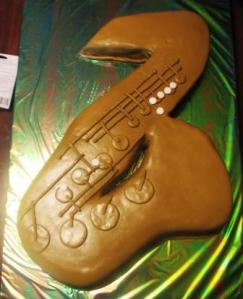
Going by the pictures, here’s what happened in the dining room while I was off doing something I’m sure was super-important like checking cake blogs. With your circles cutters and gold fondant, cut 4 extra large, 4 large, and 5 medium circles. Roll out a little white and cut out 8 small white circles. Cover those up and use the clay gun or whatever method you use for ropes to make long gold ropes. How long? Long enough. Does that help? I thought not. I used 3 ropes that were as long as the width of my dining room table. I know, it’s not an exact measurement but at least it gives you an idea. You need these ropes to be smaller in diameter than the rope you’re going to put on the board for the border. Done? Okay, cover up the ropes and uncover the gold circles. These are the keys. Using either the drawing you found on the ‘net or the picture here, smear a little bit of water on the back of the gold keys, and place them on the cake. Starting at the neck (the part below the mouthpiece), the order is: 5 medium and 4 large. At the bottom of the sax, place one extra large key and then move up the other side to place the remaining 3 extra large keys. That should take care of all the gold ones. The white ones will be used later.
Uncover your gold rope and place it accordingly, cutting off the lengths as needed. Notice the end of each piece is balled, so make that happen after you place each piece. Don’t forget to glue them down with water, but not until you’ve formed the balled ends. You’ve got pieces that go from top to bottom and pieces that go across the sax. Place the top to bottom pieces first. It’s looking swanky now, huh? Once that’s finished, go ahead and place the white keys and glue them down the same way you did the gold ones.
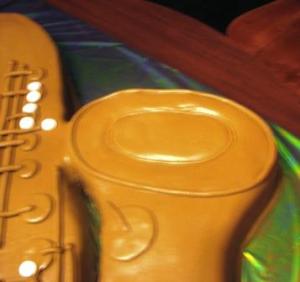
The bell looks a little blah, so we’re going to take a stab at adding some detail. It’s a little scary, but we can do this. Go to the cupboard and get a piece of ghetto Tupperware from the cabinet. Yes, that margarine bowl you have but pretend you don’t. Get that. No, the medium sized one. Take that to the sax. Squeeze the bowl so it forms an oval. Do not let it actually touch the cake yet. Hover the bowl over the bell while squeezing it and check it for size. Will it work? Drag bowls out of the cupboard as needed until you get the right size.
Here’s what you’re going to do: you’re going to squeeze the bowl into an oval shape, place it upside down on the middle of the bell (with the lip of the bowl against the sax) and gently press down on the cake. The trick here is to press with enough force to push some of the cake down while not tearing the fondant. I know this seems “over the top” but it will add dimension and realism to the cake.
Really, it will.
Go ahead.
Chicken. 🙂
Look, let me add this bit of realism for you: I tore the fondant when I did it. Yup. I pressed too hard. I tore one whole curve. I almost majorly freaked out. It’s all good, though. If you tear it, repair it. Smear shortening on your finger, rub the two sides of the tear together, and smooth it as best you can. Look at the picture. The indent you are about to make will be covered by a fondant rope to give it even more dimension. Therefore, if you can’t get it repaired perfectly, all you have to do it get it repaired well enough so that the ugly part is covered by the rope. Feel better now? A bit calmer? Go ahead and puuush the bowl into the cake. Whew! That was the last scary part. I promise. Place rope around the indentation and around the outer edge of the bell, then you can take a break to see what the heck that noise is upstairs.
Step back and take a look at it. See how great the bell looks now?
 What else is missing? Ah, yes- the mouthpiece. Measure the length and width you need to make the mouthpiece. Write it down somewhere because we have something else to do first.
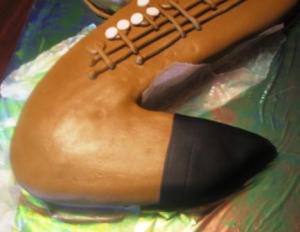
The mouthpiece is black and the ligature is gray. We need to make both colors. Using the remaining white fondant, break off a piece and knead in a tiny amount of black coloring until it’s medium-gray. Set that aside. Use gold fondant scraps and add black coloring until it’s solid black. You’ll need between a golf ball and baseball sized amount. Before you color it black, make sure you have enough gold fondant left for the border. If not, make a small batch of fondant and color it black while we continue onward with the mouthpiece.
Roll out the black fondant and cut a rough triangle using your measurements. You’ll probably have to trim it once it’s on the cake, but go ahead and try anyway. Place it, trim as necessary, and glue it down. You can impress a line on the mouthpiece like we did or leave it alone- your choice.
Roll out the gray fondant, and cut out the ligature. There are several different styles, so yours may differ from the picture. The shape we cut looked like this:

(without the lines separating the small rectangles from the large rectangle)
Glue that down and smooth it. Still using the gray fondant, roll 4 teeny balls and glue those to the ends of the ligature.
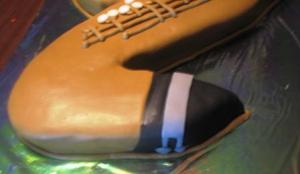
We’re almost there, folks!
Step back and take another look. Vow to never again use iridescent paper because it’s too shiny and makes taking pictures a pain the patooty.
We’re ready for the finish work. Make gold fondant ropes and glue them around the base of the cake for the border. Now aren’t you glad you didn’t put it on before? You didn’t have to take it off to put on the mouthpiece and ligature, like I did. You’re smarter than that, right?
Hopefully, you have plenty of gold pearl dust. If not, send Big Daddy out for some while we use the white pearl dust. Dust the white keys to make them pearly looking, and then dust the ligature to make it shiny, too (or use silver pearl dust on the ligature). A dab of white luster dust should be fine on the black as well. Not too much, though. You want it to be glossy, not change the color. Using gold pearl dust, brush the rest of the cake but be careful around the mouthpiece and the white keys.
All the rough edges at the edge are covered and the cake looks anchored to the board now, doesn’t it? Ahhh, it’s all in the details!
Our board looked sparse so I added the fondant letters to give it some punch. (Letter molds are available from www.wilton.com) I also added my biz card. 😉
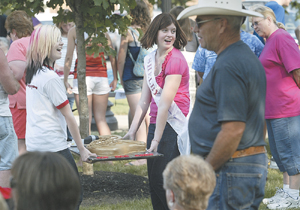
What do you think? Did we accomplish the mission? We must have because a week later I opened our small town newspaper and saw this:
Yippee!

